
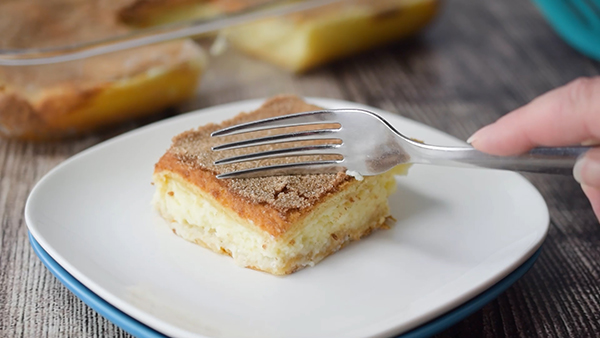
Sopapilla Bars
(Culinary.net) Finding a unique dessert to impress others can be a tall task. Cakes, brownies and cookies are classics but can be boring and repetitive. When you want something easy, delicious and made to impress, think outside the sweet treat box.
Next time you’re in a pinch for something sweet, try these Sopapilla Bars. They have a sugary, crunchy exterior, but on the inside, they are creamy and delicious.
Great for gatherings of all kinds, they’re cut into perfect portions and rare enough to give partygoers something to talk about.
The prep is simple and they can be made in advance then stored in the fridge overnight so there is no last-minute rushing around the kitchen.
To start, in a large bowl, beat cream cheese until soft. Add sugar and cornstarch then combine. Add vanilla extract and one egg then beat until combined.
Place one can of unrolled crescent rolls in the bottom of a lightly greased pan and pinch together the seams.
Add cream cheese mixture to the pan and spread out smooth. Then add remaining unrolled crescent rolls on top before spreading with melted butter.
Mix together sugar and cinnamon to sprinkle over the top of the bars.
Bake for 35-40 minutes. Cool to room temperature and chill in the fridge for at least 3 hours or overnight.
These bars are also the perfect sweet treat for kids. They will love the sugar-coated top and you will love they are expanding their palates by trying something new.
Whether it’s a birthday party, a barbecue or any celebration, this dessert is the way to go. It’s sweet, it’s got texture and it’s a home run when it comes to a simple sweet.
Find more dessert recipes at Culinary.net.
If you made this recipe at home, use #MyCulinaryConnection on your favorite social network to share your work.
Watch video to see how to make this recipe!
Sopapilla Bars
Servings: 15
- Nonstick cooking spray
- 2 packages (8 ounces each) crescent rolls
- 24 ounces cream cheese, softened
- 1 1/4 cups sugar, divided
- 1 tablespoon cornstarch
- 1 teaspoon vanilla extract
- 1 large egg
- 1/4 cup unsalted butter, melted
- 2 teaspoons cinnamon
- Heat oven to 350 F.
- Lightly grease 9-by-13-inch glass baking pan with nonstick cooking spray. Place one package unrolled crescent rolls in bottom of dish. Pinch seams together.
- In large bowl, beat cream cheese until soft. Add 1 cup sugar and cornstarch. Beat mixture until combined. Add vanilla extract and egg. Beat until combined.
- Pour batter onto crescent roll dough. Smooth with spatula.
- On floured surface, unroll second package crescent roll dough. Pinch seams and roll dough to 1/2 inch longer and wider.
- Place rolled sheet on top of cheesecake layer. Spread melted butter over top.
- In small bowl, whisk remaining sugar and cinnamon. Sprinkle over top of bars.
- Bake 35-40 minutes, or until golden brown.
- Cool to room temperature. Chill in refrigerator 3 hours or overnight.

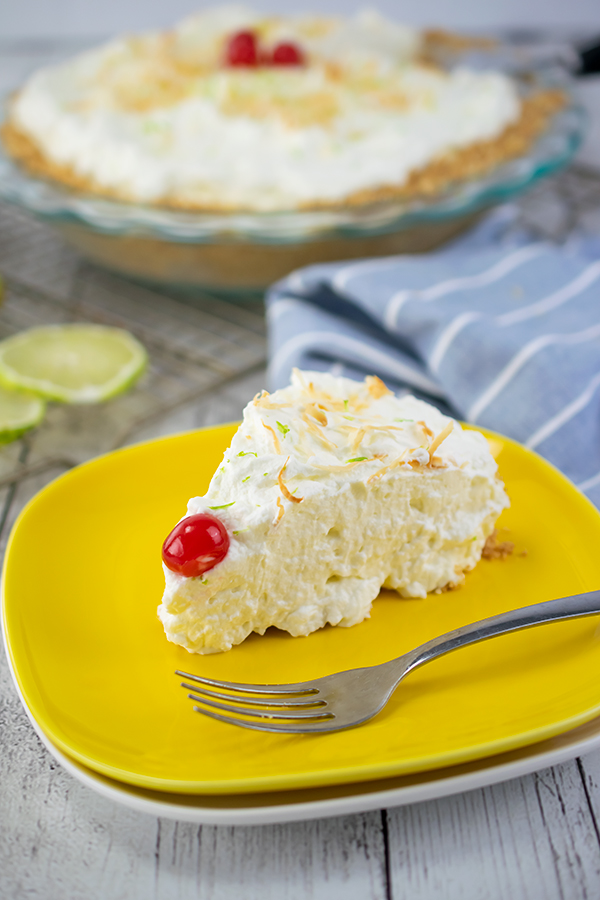
Coconut Key Lime Cream Pie
(Culinary.net) Summer is the time to relax, refresh and indulge in sweet and heavenly treats. While you’re lounging poolside and watching the kids play, enjoy a cool, creamy and absolutely divine dessert that’s perfect on a hot day.
This luscious Coconut Key Lime Cream Pie has a smooth texture with toasted shredded coconut on top. It’s sweet, but not too sweet, and will leave your taste buds wanting more as soon as you take your first bite.
Fresh out of the refrigerator, it’s ideal for everyone to share on those days when it’s just too warm outside to not have a chilled snack.
Also topped with lime zest and maraschino cherries, visually this pie is a winner with fun pops of color that will leave your mouth watering.
To make this cool, creamy creation, add vanilla wafers to a blender to make crumbs. Add melted butter and blend. Add crumb mixture to the bottom of a pie pan and press against the sides. Refrigerate to make crust.
In another large bowl, beat cream cheese, condensed milk and coconut extract.
In a different large bowl, beat whipping cream until it starts to thicken. Add powdered sugar and lime juice. Reserve 1 cup of the whipped topping.
Add lime juice, coconut flakes and the reserved whipped topping to the cream cheese mixture then stir to combine.
Add cream cheese mixture to the pie crust and smooth it out. Top with whipped topping then garnish with toasted coconut, lime zest and maraschino cherries.
It’s the perfect pie to enjoy whether you’re outside enjoying some sunshine or inside, taking a break from the summer fun. After being chilled, all of the flavors combine to leave you with a delicious, one of a kind treat.
Find more summer recipes at Culinary.net.
If you made this recipe at home, use #MyCulinaryConnection on your favorite social network to share your work.
Watch video to see how to make this recipe!
Coconut Key Lime Cream Pie
Servings: 6-8
- 1 package (11 ounces) vanilla wafers
- 1/3 cup butter, melted
- 2 cups heavy whipping cream
- 1/4 cup confectioners’ sugar
- 1/2 cup Key lime juice, divided
- 1 package (8 ounces) cream cheese, softened
- 1 can (14 ounces) sweetened condensed milk
- 1 teaspoon coconut extract
- 1 cup shredded coconut
- 1/4 cup toasted shredded coconut
- lime zest
- maraschino cherries
- In blender, pulse vanilla wafers into crumbs. Add melted butter and pulse until combined. Press crumbs into bottom and up sides of greased 9 1/2-inch deep-dish pie plate. Refrigerate 30 minutes.
- In large bowl, beat whipping cream until it thickens. Add confectioners’ sugar and 1 tablespoon lime juice; beat until stiff peaks form. Remove 1 cup; set aside.
- In separate large bowl, beat cream cheese until smooth. Add sweetened condensed milk and coconut extract; beat until blended. Add remaining lime juice and shredded coconut; stir until combined. Add reserved whipped cream. Stir until combined. Pour into crust.
- Refrigerate 4 hours.
- Before serving, garnish with toasted coconut, lime zest and maraschino cherries.

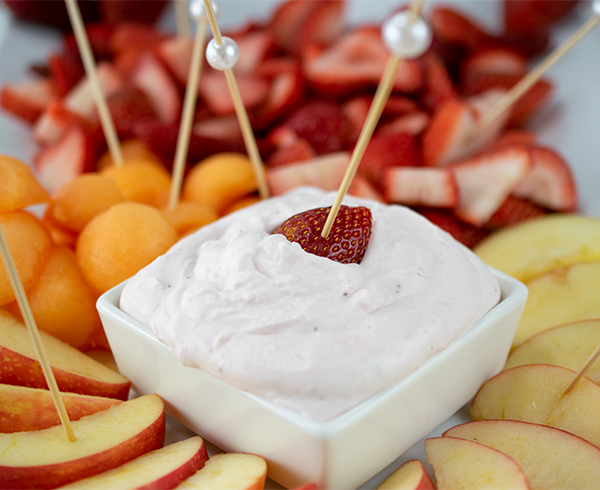
Strawberry Mousse
(Culinary.net) A lazy Sunday afternoon cuddled up with family, playing in the rain with your kids and tasting a perfect, sweet treat on a summer day can be some of the simplest yet best parts of life.
Recipes that can be made with clean, fresh ingredients in a matter of minutes make some of the best-tasting dishes, snacks and treats. Sometimes keeping it simple is the best route to take as opposed to confusing prep that takes too much time.
This Strawberry Mousse, which is made with families in mind, is a perfect recipe to make with your little ones or for a date night dessert. It’s great to take for an outing at the park, a neighborhood party or just to snack on throughout the week.
It’s sweet, fluffy and smooth all at the same time. Made to serve a handful of people, it only takes a few moments to complete. Moms love it and kids enjoy the taste and texture.
To start, puree 1 cup of strawberries in blender until smooth.
In a mixing bowl, combine whipping cream and powdered sugar until smooth.
In a different bowl, beat cream cheese until smooth then add the pureed strawberries.
Finally, add the whipped cream mixture to the cream cheese and strawberries. Stir all the components together until they reach the desired consistency before serving with fresh fruit.
It’s easy, fresh and delicious. Your kids can help you combine all the ingredients and excitedly try the sweet result.
Find more sweet recipes at Culinary.net.
If you made this recipe at home, use #MyCulinaryConnection on your favorite social network to share your work.
Watch video to see how to make this recipe!
Strawberry Mousse
Servings: 6-8
- 1 cup strawberries, halved
- 2 cups heavy cream
- 1 cup powdered sugar
- 1 package (8 ounces) cream cheese, softened
- assorted fruit, for serving
- In blender, puree strawberries until smooth. Set aside.
- In mixing bowl, whip heavy cream and powdered sugar until fluffy.
- In separate mixing bowl, beat cream cheese until smooth. Add strawberry puree to cream cheese and mix until combined. Add whipped cream and stir until combined.
- Serve in bowl with fruit.

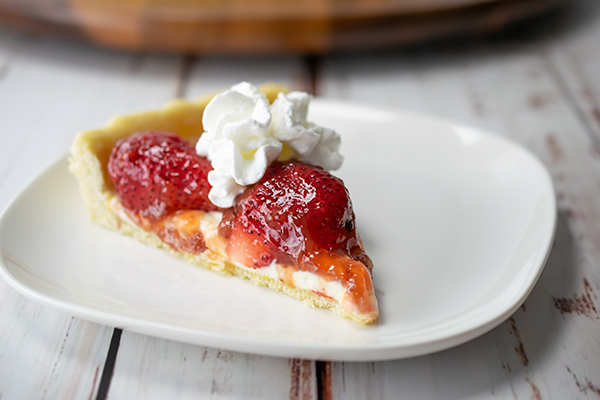
Strawberry Cream Cheese Tart
Summer days can be long and boring, especially when the kids are out of school and there is nothing to do around the house as a family. When the minutes creep by and it’s too hot to go outside, the dog days of summer can be pretty miserable.
However, this recipe for a Strawberry Cream Cheese Tart can give the kids something to look forward to as a dish the whole family can participate in creating. This recipe is perfect for little ones wanting to get creative and perfectly place fresh strawberries on top of a delicious tart.
In a food processor, mix flour, sugar and salt until combined. Then add butter, an egg and vanilla extract. Mix again until combined.
Flour your working surface and create a dough ball from the mixture. Flatten it slightly to form a disc. Wrap in plastic wrap and refrigerate for 1 hour.
After time has passed, lightly flour your surface once more. Roll out dough into an 11-inch circle. Place circle on a 9-inch tart pan. Roll over the top to trim. Cover with plastic wrap and freeze for about 30 minutes.
Prepare the tart crust for baking by covering it with aluminum foil then bake for 20 minutes. Wait for the crust to cool completely.
To make the filling, in a medium bowl, mix cream cheese, sour cream, sugar, lemon zest and vanilla extract until smooth. Spread mixture onto cooled tart crust.
Microwave fruit spread and lemon juice while stirring often. Arrange halved strawberries on tart. Drizzle with fruit spread. Top with whipped cream before serving.
This sweet tart can brighten up your summer blues with fresh fruit, a sweet spread and a flaky, crispy crust.
Find more sweet summer recipes at Culinary.net.
Did you make this recipe? We would love to see it! Use #MyCulinaryConnection on your favorite social network and let us see your work!
Watch video to see how to make this recipe!
Strawberry Cream Cheese Tart
Servings: 8
Crust:
- 1 1/4 cups flour
- 1/4 cup granulated sugar
- 1/4 teaspoon salt
- 1/2 cup cold butter, cut into small cubes
- 1 large egg
- 1/2 teaspoon vanilla extract
- uncooked rice
Filling:
- 8 ounces reduced-fat cream cheese
- 1/4 cup sour cream
- 2 tablespoons extra-fine sugar
- 1 tablespoon lemon zest
- 1/2 teaspoon vanilla extract
- 1/2 cup strawberry fruit spread
- 3 teaspoons lemon juice (optional)
- 1 pound strawberries, halved
- whipped cream (optional)
- Heat oven to 375 F.
- To make crust: In food processor, add flour, sugar and salt; pulse until combined. Add butter, egg and vanilla extract; pulse until combined and crumbly.
- Lightly flour surface then form dough into ball. Slightly flatten to form thick disc. Wrap dough in plastic wrap; refrigerate 1 hour.
- Flour surface then roll dough to 11-inch circle. Place dough in 9-inch tart pan with removeable bottom. With rolling pin, roll over top to trim excess dough around edges.
- Cover dough with plastic wrap and freeze until firm, about 30 minutes.
- Press aluminum foil against crust, covering edges to prevent burning. Fill and distribute uncooked rice evenly. Bake 20 minutes. Cool completely.
- To make filling: In medium bowl, beat cream cheese, sour cream, sugar, lemon zest and vanilla extract until blended and smooth. Spread cheese mixture evenly over crust. Refrigerate 1 hour.
- In small bowl, microwave fruit spread and lemon juice, if desired, stirring often.
- Arrange strawberry halves around tart. Drizzle heated fruit spread over strawberries. Top with whipped cream, if desired.

Fluffy Peanut Butter Pie
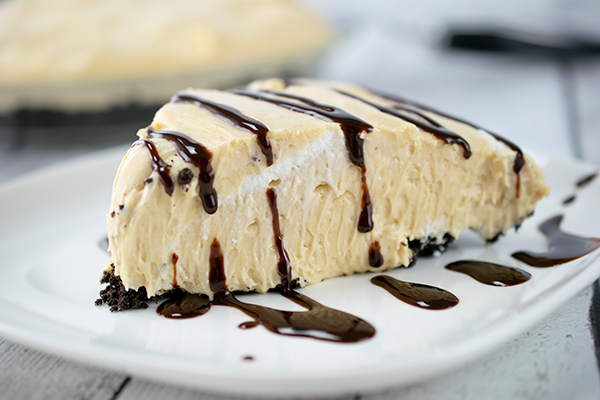
(Culinary.net) If you’ve ever taken a bite of something and the only word that came to mind was “yum,” you know what it’s like to experience this dessert. It’s fluffy, sweet, perfectly crumbly and tastes delicious. It’s rich but light. It’s a dessert that will likely never go out of style.
You can stop guessing what it may be: this treat is a scrumptious bite of Fluffy Peanut Butter Pie drizzled with chocolate syrup. You will understand the craze once you sink your fork into the chilled triangle resting on your plate. With a chocolate cookie crust and a thick, delicious peanut butter filling, this pie is everything many people want in a dessert.
Although it tastes like you have been in the kitchen all day, it’s a simple-to-make, delightful treat with luscious peanut butter flavor that melts in your mouth.
To make this pie, remove the filling from 20 chocolate cookies and crush them with a rolling pin until they are just crumbs. Mix cookie crumbs with melted butter and mold into a pie dish to create the crust.
Next, in a mixer, combine cream cheese and reserved cookie filling. Then add sweetened condensed milk, peanut butter, lemon juice and vanilla extract while you continue mixing.
In a mixing bowl, beat whipping cream until stiff peaks form. Fold peanut butter mixture in with the whipping cream.
Layer the peanut butter and whipping cream mixture on top of the crust in the pie pan. Chill for about 4 hours then drizzle with chocolate syrup just before serving.
This dessert is perfect for anyone with a sweet tooth. House guests, birthday parties or even just a simple treat after a meal; it’s an any-occasion kind of pie.
Find more dessert recipes at Culinary.net.
Watch video to see how to make this recipe!
Fluffy Peanut Butter Pie
Servings: 6-8
- 20 chocolate cream-filled cookies
- 1/4 cup butter, melted
- 1 package (8 ounces) cream cheese, softened
- 1 cup smooth peanut butter
- 1 can (14 ounces) sweetened condensed milk
- 3 tablespoons lemon juice
- 1 teaspoon vanilla extract
- 1 cup whipping cream
- chocolate syrup
- Remove cream filling from chocolate cookies; set aside. With rolling pin, finely crush chocolate cookies.
- In medium bowl, combine finely crushed cookies with melted butter.
- Press crumb mixture firmly into bottom and sides of 9-inch pie plate; chill while preparing filling.
- In large bowl, beat cream cheese until fluffy. Add reserved cookie cream filling, peanut butter and sweetened condensed milk; beat until smooth. Stir in lemon juice and vanilla extract.
- In medium bowl, beat whipping cream until stiff peaks form. Fold whipped cream into peanut butter mixture. Mix until combined.
- Pour into crust. Chill 4 hours, or until set. Drizzle chocolate syrup over pie before serving.
- Cover leftovers and store in refrigerator.

Easter Bunny Rolls with Spinach Dip
(Culinary.net) Easter is about coming together with loved ones, enjoying beautiful spring weather and eating your family’s favorite foods. The kids will be playing, adults will be chatting and all will be patiently waiting for the table to be set.
If you’re visiting and making memories with family and friends you haven’t seen in a while, there are few things better than diving into a marvelous Easter spread.
While eyeing the table, you notice all the colors popping off the dishes. Fruits and veggies make the feast come to life, but a warm Easter dip paired with rolls for dipping is a perfect way to start the festivities.
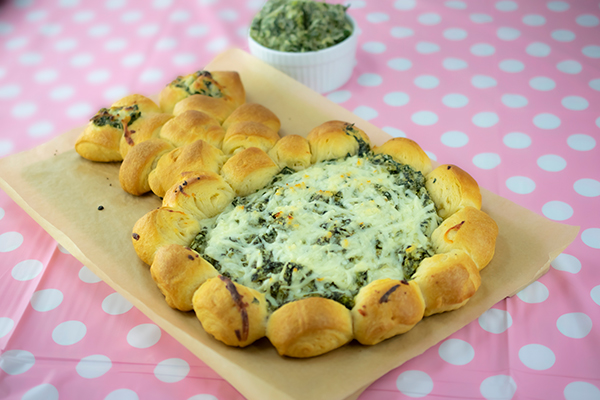
These Easter Bunny Rolls with Spinach Dip are as eye-catching as they are delicious. Not only will the kids love its shape, but the layers of taste will wow your Easter crowd.
To make this recipe, start by combining a 16-ounce package of frozen spinach, cream cheese and garlic in a skillet. Once heated, add mayonnaise, salt, onion powder, chili powder and Italian seasoning.
Add in Parmesan and mozzarella cheeses then stir until combined.
Next, roll out crescent rolls. Stretch the dough then cut into 24 rolls.
Form the bunny shape and scoop your spinach dip mixture into the center of the bunny and its ears. Sprinkle the spinach dip with mozzarella cheese before baking at 375 F for 18 minutes.
This dish is made for a crowd, served warm and full of cheesy goodness. You can watch as your family dips into the spinach and one-by-one, before you know it, the rolls will have disappeared and the dip will be devoured.
Find more Easter recipes at Culinary.net.
Watch video to see how to make this recipe!
Easter Bunny Rolls with Spinach Dip
Serves: 24
- 16 ounces frozen spinach, thawed
- 8 ounces cream cheese
- 2 cloves garlic, minced
- 1/2 cup mayonnaise
- 1/2 teaspoon salt
- 1/2 teaspoon onion powder
- 1/4 teaspoon chili powder
- 1/4 teaspoon pepper
- 1 teaspoon Italian seasoning
- 1 cup shredded Parmesan cheese
- 1 1/2 cups shredded mozzarella cheese, divided
- 2 crescent roll tubes (8 ounces each)
- Heat oven to 375 F.
- In skillet, over medium heat, cook spinach, cream cheese and garlic 3-4 minutes until cream cheese is melted. Stir in mayonnaise, salt, onion powder, chili powder, pepper and Italian seasoning. Stir in Parmesan cheese and 1/2 cup mozzarella cheese. Cook until cheese is melted. Keep skillet on burner over low heat.
- Remove dough from tubes. Leaving dough intact, roll and stretch into 18-inch ropes. Cut each rope into 12 pieces for 24 total.
- On baking sheet with parchment paper, form bunny head by placing one piece of dough in middle then surrounding it with six more pieces. Use 13 pieces to form round body. Use remaining pieces to form ears on top of head.
- Scoop hot spinach dip into center. Spoon small portions on each ear. Sprinkle ears and belly with remaining mozzarella cheese.
- Bake 18 minutes, or until crescent dough is golden brown and thoroughly cooked.

Mint Brownies
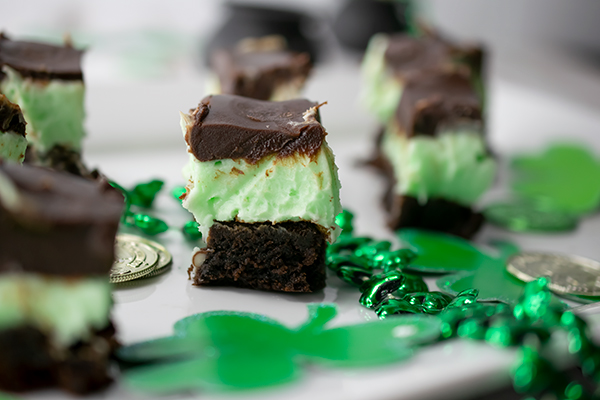
(Culinary.net) How lucky you must be to come across this recipe just in time for St. Patrick’s Day. This one is a twisted combination of mint and sweet chocolate that’s sure to have almost anyone’s taste buds screaming “yum.” This dessert might just be the pot of gold at the end of your rainbow this year.
These Mint Brownies have three delicious layers. First, a supreme brownie on bottom. Then a fluffy, green mint layer that’s full of flavor and color. Last, but definitely not least, a chocolate layer on top made with chocolate chips, butter and a little whipping cream.
All of these layers create a smooth, sweet, minty, bite-sized dessert perfect for any occasion but especially St. Patrick’s Day. The green mint color really pops off the plate, giving it some extra flare and an appetizing glow.
To start, create the soft, chocolate filled brownie. Combine brownie mix, vegetable oil, one egg, water and the chocolate syrup pouch. Bake and cool completely.
Then it’s time for some colorful, festive fun. Make the filling with powdered sugar, butter, whipping cream, softened cream cheese, a splash of peppermint extract and a few drops of green food coloring. Beat and pour over the cooled brownie pan.
The last layer is simple. In a saucepan, melt whipping cream, chocolate chips and butter until smooth. When it’s cooled to lukewarm, pour it over the filling for the final layer.
Refrigerate the Mint Brownies for two hours before serving. Cut them into bite-size pieces for small chunks that will melt in your mouth.
Find more seasonal dessert recipes at Culinary.net.
Watch video to see how to make this recipe!
Mint Brownies
Servings: 9-12
- Nonstick cooking spray
- 1 box supreme brownie mix with chocolate syrup pouch
- 3 tablespoons water
- 1/3 cup vegetable oil
- 1 egg
Filling:
- 3 1/2 cups powdered sugar
- 1/4 cup butter, softened
- 1/4 cup whipping cream
- 5 ounces cream cheese, softened
- 1/2 teaspoon peppermint extract
- 5 drops green food color
Topping:
- 1/2 cup whipping cream
- 1 bag (12 ounces) chocolate chips
- 1/2 cup butter
Heat oven to 350 F.
- Spray 8-by-8-inch pan with nonstick cooking spray.
- In large bowl, mix brownie mix, water, oil and egg until combined. Pour into prepared baking pan. Bake 35 minutes. Cool completely, about 1 hour.
- To make filling: In large bowl, beat powdered sugar, butter, whipping cream, cream cheese, peppermint extract and food coloring. Spread over cooled brownies. Refrigerate 1 hour, or until set.
- To make topping: In saucepan, melt whipping cream, chocolate chips and butter until smooth. Cool until lukewarm, about 10 minutes. Pour over filling; spread to cover. Refrigerate 2 hours, or until set.
- Before serving, let brownies set 10 minutes at room temperature.
Tips: Cut brownies with wet knife for cleaner cuts. Store covered in refrigerator.

New Year Nutrition
Take on 2021 with a sustainable, low-carb eating plan
(Family Features) A new year brings with it new opportunities to better yourself in all kinds of ways, including your health. Start by evaluating your at-home menu to make sure it aligns with your nutritional goals.
These recipes for Vegetarian Ramen Zoodle Bowls, Broccolini and Bacon Egg Bites and Flourless Salted Peanut Butter Chocolate Chip Cookies from Atkins offer better-for-you options that fit within a low-carb lifestyle that can help you eat right and make smarter choices in your kitchen. Each option offers a balanced approach to eating comprised of high-fiber carbohydrates, optimal protein and healthy fats. Plus, they’re easily personalized, allowing each recipe to help you meet your goals regardless of what eating plan you’re following and whether you’re looking to achieve weight loss, maintain your weight or achieve optimal health.
An Easy-to-Follow Food Guide
The latest science continues to support the many health benefits of a low-carb approach to eating beyond just weight loss. Simply reducing your carb and sugar intake by two-thirds over the “Standard American Diet” helps avoid the development of obesity, metabolic syndrome and type 2 diabetes.
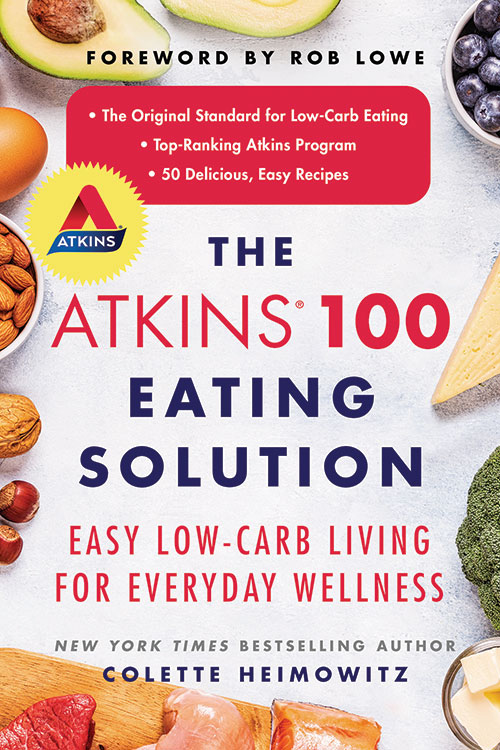
While many eating approaches can be vague in their approach, “The Atkins 100 Eating Solution’s” fan-favorite program provides a clear-cut way to control your carb intake with 100 grams of net carbs (the total carbohydrate content of the food minus the fiber content and sugar alcohols) and shows you how to make delicious and satisfying food choices that lessen their impact on your blood sugar. This personalized approach is a way of eating you can follow for life.
With cutting-edge research and delicious recipes, this book provides a variety of foods with plenty of room for personalization. This easy-to-use guide, written by Colette Heimowitz, the company’s vice president of nutrition and education, can also show you how the plan can be modified to fit in with most ways of eating, including vegetarian, Paleo, Mediterranean and more regardless of food preferences, lifestyle or cooking abilities.
Visit atkins.com/atkins-100-eating-solution-book to purchase the book.

Vegetarian Ramen Zoodle Bowls
Recipe courtesy of “The Atkins 100 Eating Solution”
Total time: 30 minutes
Servings: 4
- 4 large eggs
- ice water
- 2 cups fresh water
- 1 quart vegetable broth
- 5 ounces (3 cups) broccoli florets, cut into bite-size pieces
- 10 ounces (4 cups) spiralized zucchini
- 5 ounces (5 packed cups) baby spinach
- 1 tablespoon, plus 2 teaspoons, white miso paste
- 1/4 teaspoon kosher salt, plus additional, to taste, divided
- 1 tablespoon toasted sesame oil, plus additional for garnish, to taste
- 2 cups mung bean sprouts, for garnish
- chili garlic sauce, for garnish
- 1 cup shredded raw carrot, for garnish
- 4 tablespoons crushed peanuts, for garnish
- In large saucepan of gently boiling water, cook eggs 7 minutes then transfer to bowl of ice water.
- Drain cooking water from saucepan then add broth and fresh water. Bring to simmer over medium-high heat. Add broccoli and cook 3 minutes then add zucchini and spinach. Continue cooking until spinach is wilted and zucchini is crisp-tender, 2-3 minutes. Remove from heat.
- Ladle about 1/2 cup broth from saucepan into small bowl. Add miso paste and 1/4 teaspoon salt; whisk to combine. Return mixture to soup, add sesame oil and stir to combine. Add additional salt, to taste. Cover to keep warm.
- Remove eggs from ice bath; peel then cut in half lengthwise. Ladle 2 cups soup into four serving bowls. Top each portion with one egg and 1/2 cup sprouts. Drizzle with chili garlic sauce and additional sesame oil, to taste. Top each serving with 1/4 cup shredded carrot and 1 tablespoon crushed peanuts.
Nutritional information per serving: 10 grams net carbs; 17 grams total carbs; 7 grams fiber; 16 grams protein; 13 grams fat; 253 calories.
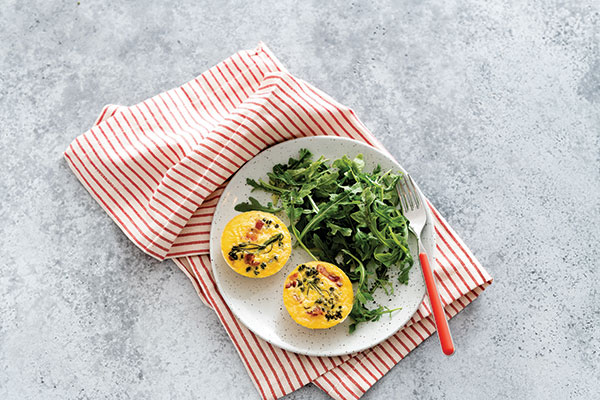
Broccolini and Bacon Egg Bites
Recipe courtesy of “The Atkins 100 Eating Solution”
Total time: 45 minutes
Servings: 4
- Nonstick cooking spray
- 5 slices (4 ounces) no-sugar- added bacon
- 5 large eggs
- 3 ounces cream cheese
- 2 tablespoons feta cheese
- 1 tablespoon hot sauce
- 1/2 teaspoon kosher salt, plus additional, to taste, divided
- 4 1/2 ounces broccolini (5-7 stalks), stalks and florets thinly sliced
- 1 tablespoon water
- 1 1/2 cups baby arugula
- 1 tablespoon lemon juice
- 1 tablespoon extra-virgin olive oil
- freshly ground black pepper, to taste
- 1 cup fresh blueberries
- Preheat oven to 350 F. Lightly coat eight silicone egg-bite mold cups or eight cups of standard nonstick muffin tin with nonstick cooking spray and set in large baking pan.
- In large nonstick skillet, cook bacon over medium heat until golden, about 5 minutes per side. Transfer to paper towel-lined plate to drain. Chop bacon into small pieces.
- In blender, puree eggs, cream cheese, feta cheese, hot sauce and 1/4 teaspoon salt until smooth.
- Pour off all but 1 tablespoon fat from skillet. Add broccolini, water and 1/4 teaspoon salt. Cook over medium-high heat, stirring frequently, until broccolini is tender, 3-5 minutes. Remove from heat.
- Fill each egg cup with 1 teaspoon bacon and 1 tablespoon broccolini. Top with egg mixture, filling cups to about 1/8 inch from top. Add just enough boiled water to baking pan to come halfway up sides of molds.
- Bake egg bites until set, 20-25 minutes. Take pan from oven then take molds from water bath. Let egg bites cool then remove from molds.
- In medium bowl, toss arugula, lemon juice, oil and salt and pepper, to taste. Place 3/4 cup salad, two egg bites and 1/4 cup blueberries on four plates and serve.
Nutritional information per serving: 9 grams net carbs; 11 grams total carbs; 2 grams fiber; 14 grams protein; 34 grams fat; 400 calories.
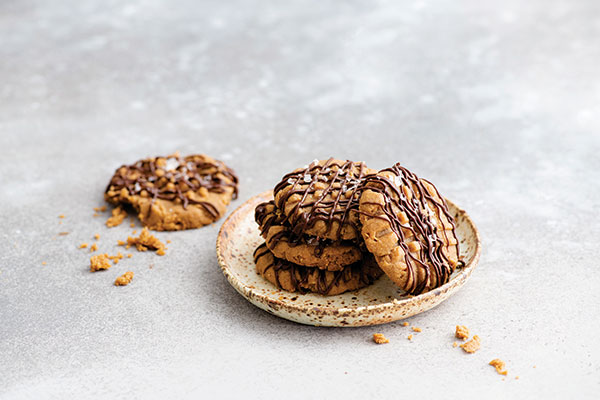
Flourless Salted Peanut Butter Chocolate Chip Cookies
Recipe courtesy of “The Atkins 100 Eating Solution”
Total time: 50 minutes
Yield: 24 cookies
- 1 cup sugar-free smooth or creamy peanut butter
- 2 teaspoons stevia extract powder
- 1/2 teaspoon baking soda
- 1/4 teaspoon kosher salt
- 1 large egg
- 1 teaspoon vanilla extract
- 1/2 cup sugar-free semisweet chocolate chips
- 1 teaspoon flaky sea salt
- Set oven racks in upper- and lower-third positions. Preheat oven to 350 F. Line two cookie sheets with parchment paper.
- In medium bowl, use handheld electric mixer on medium speed to beat peanut butter, stevia, baking soda and salt, scraping down sides if needed, until well combined, about 1 minute. Reduce speed to low, add egg and vanilla extract; beat until combined.
- Shape dough into 24 balls (about 1 tablespoon each) and place 2 inches apart on prepared cookie sheets. Using tines of fork, carefully flatten each ball, creating crisscross pattern.
- Bake, rotating cookie sheets from top to bottom and back to front halfway through, until edges begin to brown and cookies are set, 7-9 minutes. Cookies should not be browned. Let cool 10 minutes on cookie sheets then carefully transfer to cooling rack to cool completely.
- In small microwave-safe bowl, add chocolate chips and microwave on high in 20-second increments, stirring after each, until melted, about 1 minute.
- Dip dry fork into chocolate then drizzle over cookies. Sprinkle with sea salt.
Nutritional information per serving (1 cookie): 1.5 grams net carbs; 3 grams total carbs; 1.5 grams fiber; 3 grams protein; 6.5 grams fat; 79 calories.
Source: Atkins

Savory Cheese Balls
(Culinary.net) It’s the holiday season and your family can feel the cheer as loved ones fill their appetizer plates and excitement fills the air as gifts are being placed beneath the tree.
Someone asks, munching away near the table, “Wow, how did you make this?” In your mind, you think, “It was too easy.”
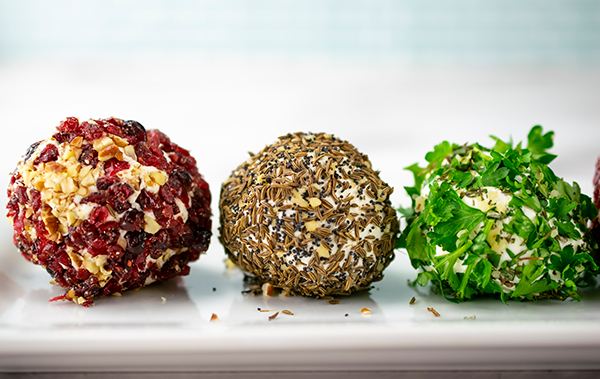
These Savory Cheese Balls are not only simple to make but perfect for any holiday get-together or celebration. They’re fun to create and even more enjoyable to dive in to once finished. Texture and color are the name of the game with this recipe. The result is a beautiful array of red, gold and green, all on one plate.
Start by rolling cream cheese into balls and mixing up three bowls with powerful flavors to create the three different colors. The “green” bowl gets parsley, thyme, rosemary and, of course, some garlic, just for an extra kick of seasoning. The “gold” ball calls for caraway seeds, poppy seeds and garlic. Finally, the “red” ball includes cranberries and pecans.
Simply roll each cream cheese ball around gently until it’s coated. It doesn’t get any simpler than that. Display the array of cheese balls on a festive plate for something equally cheery and heavenly. Serve the plate with crackers, fruit or vegetables for complementary dipping options.
Find more recipes and holiday fun this season at Culinary.net.
Watch video to see how to make this recipe!
Savory Cheese Balls
Servings: 6-12
- 2 packages (8 ounces each) cream cheese
- 2 tablespoons caraway seeds
- 1 teaspoon poppy seeds
- 2 cloves garlic, minced, divided
- 1/4 cup parsley, chopped
- 2 teaspoons thyme leaves, chopped
- 1 teaspoon rosemary, chopped
- 1/4 cup dried cranberries, chopped
- 2 tablespoons pecans, chopped
- crackers (optional)
- fruit (optional)
- vegetables (optional)
- Cut each cream cheese block into three squares. Roll each square into ball.
- In small bowl, combine caraway seeds, poppy seeds and half the garlic.
- In second small bowl, combine parsley, thyme, rosemary and remaining garlic.
- In third small bowl, combine cranberries and pecans.
- Roll two cheese balls in seed mixture, two in herb mixture and two in cranberry mixture.
- Cut each ball in half and serve with crackers, fruit or vegetables, if desired.

Easy Crab Rangoon
Appetizers are many people’s favorite part of a meal. From dips and finger foods to little treats and fried pieces of perfection, there is a wide array of considerations for a pre-meal snack.
Some appetizers are much more appropriate at certain events. For example, buffalo chicken wings are best enjoyed on game days, salads are normally served at showers and vegetable trays are a typical Thanksgiving Day classic.
However, there are recipes that are too easy to make and too satisfying not to serve at almost every festivity you and your family attend. This Easy Crab Rangoon shines above the rest for many reasons, but the main point of this heavenly sample is it’s easy to make and bake.
This appetizer is placed in the oven until it’s golden brown, topped with little green scallions with a creamy filling all packaged in a crispy outer layer.
Plus, the cream cheese is mixed with luscious amounts of crab meat. This is a seafood lover’s dream. Actually, it’s any appetizer lover’s dream.
To make this mouthwatering recipe, you only need a handful of ingredients and a few kitchen tools.
The little bites of perfection come out of the oven steaming hot, waiting to be topped with more crunchy, fresh scallions. Once they have cooled for a few moments, they are ready to be devoured.
This bite-size, savory snack will be all the rage at family dinners and parties with the kids alike. They fit perfectly in the palms of hands and within a few bites, they are gone and your loved ones are asking for seconds.
Find more appetizer recipes that are simple and made to impress at Culinary.net.
Watch video to see how to make this recipe!

Easy Crab Rangoon
Servings: 12
- Nonstick cooking spray
- 12 wonton wrappers
- 4 ounces cream cheese, softened
- 4 ounces lump crabmeat
- 1 scallion, sliced thin, green and white parts separated
- 1 teaspoon fresh ginger, grated
- 1 teaspoon soy sauce
- Heat oven to 350 F.
- Spray muffin pan with nonstick cooking spray. Press wonton wrappers into muffin cups. Lightly spray wrappers with nonstick cooking spray and bake until lightly browned, 6-9 minutes. Let cool slightly.
- In medium bowl, beat cream cheese until smooth. Combine with crabmeat, scallion whites, ginger and soy sauce. Fill each wonton wrapper with filling. Bake until filling is heated through, 6-8 minutes.
- Sprinkle with scallion greens. Serve warm.