
Simple Macaroons
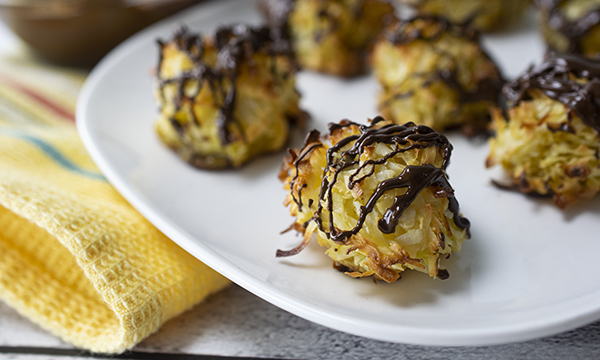
(Culinary.net) When celebrating with family, there is nearly nothing better than passing a light and sweet dessert around the table. These Simple Macaroons are crisp, dipped in decedent chocolate and a completely scrumptious option for celebrating Passover.
Simple to make and easy to eat, this sweet dessert is a crowd favorite. With a fresh kick of lemon zest and crunch of shredded coconut, they are a bite-sized, delicious way to end your meal.
They take little to no time to make, only baking 10-12 minutes for a tray full of tasty dessert bites ready to devour.
With sweet honey and vanilla, the flavors come together to create something sweet but not overpowering. It’s a small, crumbly bite that’s perfect for sharing during Passover.
Find more sweet treat recipes for any holiday at Culinary.net.
Watch video to see how to make this recipe!
Simple Macaroons
Recipe adapted from marthastewart.com
Yield: 15 macaroons
- 1 large egg
- 2 1/4 tablespoons honey
- 1/4 teaspoon vanilla extract
- grated lemon zest
- 1/4 teaspoon salt
- 1 1/4 cups shredded coconut
- 5 ounces dark chocolate, melted
- Preheat oven to 375 F.
- In bowl, whisk egg. Add honey, vanilla, lemon zest and salt; whisk. Stir in coconut until completely coated with egg mixture.
- Using 1 1/2-inch ice cream scoop, make 15 balls, transferring each to parchment-lined baking sheet, spacing about 2 inches apart.
- Bake macaroons 10-12 minutes, rotating halfway through, until coconut starts to brown on edges.
- Transfer sheet to wire rack and let cool.
- Before serving, drizzle with melted chocolate or dip bottom sides of macaroons in melted chocolate to cover bases. Refrigerate 15 minutes to set.
Source: Culinary.net

Peanut Butter Crunch
(Family Features) Adding better-for-you recipes to your family’s menu can be as simple as incorporating protein with ingredients that enhance flavor and nutrition.
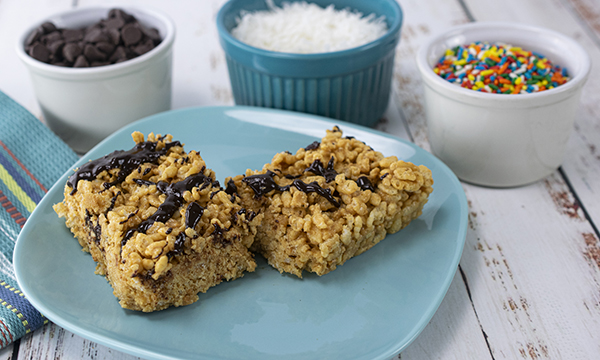
For example, this Peanut Butter Crunch is powered by peanuts, a nutrient-rich superfood that delivers 19 vitamins and minerals plus 7 grams of protein per serving. It’s a simple, sweet way to enjoy an at-home dessert without ditching health goals.
Visit gapeanuts.com to find more recipes that pack a protein punch.
Watch video to see how to make this recipe!
Peanut Butter Crunch
Yield: 2 dozen squares
- 1 cup light corn syrup
- 1 cup granulated sugar
- 1 jar (12 ounces) crunchy peanut butter
- 6 cups crisp rice cereal
- coconut flakes, for topping (optional)
- chocolate chips, for topping (optional)
- melted chocolate, for topping (optional)
- sprinkles, for topping (optional)
- In 2-quart microwave-safe container, stir syrup and sugar.
- Microwave 1 1/2-2 minutes on high, or until sugar is dissolved.
- Stir in peanut butter until well blended.
- Mix in cereal.
- Pour into 8-by-12-inch buttered pan.
- When cooled, cut into squares and top with coconut flakes, chocolate chips, melted chocolate or sprinkles, if desired.
Source: Georgia Peanut Commission

Arkansas Possum Pie
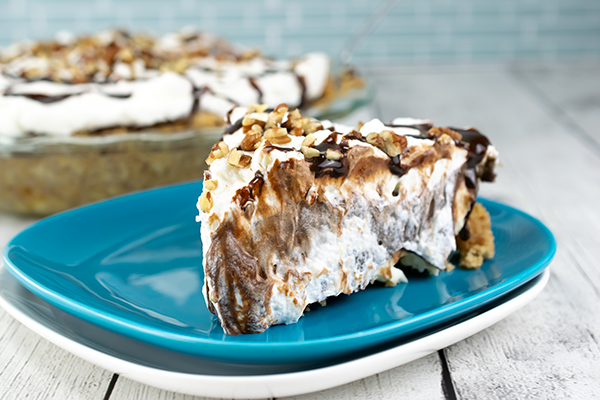
The star of your next spread can be hidden away in the refrigerator for a surprise delight for your guests. It’s topped with chocolate syrup and chopped pecans, and your loved ones just may vote it to be their favorite dish.
It’s an Arkansas Possum Pie, made with three delicious layers and crunchy toppings for a show-stopping dessert.
In a saucepan, melt butter. Add flour and stir to combine. Add crushed pecans and brown sugar. Stir to combine and form to the bottom of a pie pan. Bake for 15-20 minutes at 350 F.
In a separate bowl, add cream cheese and beat until smooth. Add powdered sugar and heavy cream. Stir to combine. Add to pie pan over cooled pecan crust. Refrigerate.
To make the pudding layer, whisk egg yolks in a bowl then whisk in whole milk.
In a separate bowl, add sugar, cocoa powder, cornstarch, flour and salt. Whisk to combine.
In a saucepan over medium heat, add egg mixture followed by the dry mixture and stir. Add butter and vanilla extract, stirring until butter is melted.
Pour pudding mixture into a separate pie pan and cover with plastic wrap. Refrigerate for 30 minutes. Once cooled, add on top of the other layers and spread evenly.
Refrigerate pie overnight.
To make whipped topping, in a mixer, add heavy whipping cream, powdered sugar and vanilla extract. Beat to combine. Add whipped topping to the top of the chilled pie.
Drizzle with chocolate syrup and sprinkle with chopped pecans.
Whether it’s a holiday, birthday or reunion, this pie is a perfect conversation starter. It’s sweet, crunchy and filled with creamy, delightful layers of goodness.
Find more unique dessert recipes at Culinary.net.
If you made this recipe at home, use #MyCulinaryConnection on your favorite social network to share your work.
Watch video to see how to make this recipe!
Arkansas Possum Pie
Servings: 8
Crust:
- 3/4 cup butter
- 1 1/2 cups flour
- 1/2 cup brown sugar
- 1 1/2 cups pecans, crushed
Cream Cheese Layer:
- 12 ounces cream cheese, softened
- 1 cup powdered sugar
- 4 tablespoons heavy cream
Pudding Layer:
- 3 egg yolks
- 2 cups whole milk
- 1 cup sugar
- 1/3 cup cocoa powder
- 3 tablespoons cornstarch
- 2 tablespoons flour
- 1/4 teaspoon salt
- 2 tablespoons butter
- 1 teaspoon vanilla extract
Whipped Cream Topping:
- 1 cup heavy whipping cream
- 4 tablespoons powdered sugar
- 1 teaspoon vanilla extract
- chocolate syrup
- 1/2 cup chopped pecans
- Heat oven to 350 F.
- To make crust: In saucepan, melt butter; add flour, brown sugar and crushed pecans. Stir until combined. Press into 9 1/2-inch deep pie plate.
- Bake 15-20 minutes until crust begins to brown. Cool completely.
- To make cream cheese layer: In medium bowl, mix cream cheese until creamy. Add powdered sugar and heavy cream; mix until smooth. Spread over cooled pecan crust. Refrigerate.
- To make pudding layer: In medium bowl, whisk egg yolks. Add milk; whisk until combined. Set aside.
- In separate medium bowl, whisk sugar, cocoa powder, cornstarch, flour and salt until combined.
- In saucepan over medium heat, add egg yolk mixture and flour mixture. Whisk constantly until pudding begins to thicken and bubble. Add butter and vanilla extract, stirring until butter is melted. Pour chocolate pudding in shallow bowl. Cover with plastic wrap touching pudding to keep it from forming skin. Refrigerate 30 minutes.
- Pour pudding over cream cheese layer. Cover pie with plastic wrap. Refrigerate overnight.
- To make whipped cream topping: In stand mixer bowl, add heavy cream, powdered sugar and vanilla extract. Whip until stiff peaks form. Spread whipped cream over pudding layer.
- Drizzle pie with chocolate syrup and sprinkle with chopped pecans.

Strawberry Mousse
(Culinary.net) A lazy Sunday afternoon cuddled up with family, playing in the rain with your kids and tasting a perfect, sweet treat on a summer day can be some of the simplest yet best parts of life.
Recipes that can be made with clean, fresh ingredients in a matter of minutes make some of the best-tasting dishes, snacks and treats. Sometimes keeping it simple is the best route to take as opposed to confusing prep that takes too much time.
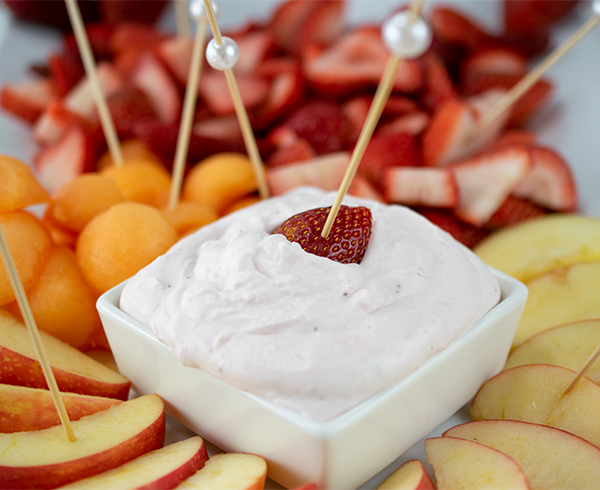
This Strawberry Mousse, which is made with families in mind, is a perfect recipe to make with your little ones or for a date night dessert. It’s great to take for an outing at the park, a neighborhood party or just to snack on throughout the week.
It’s sweet, fluffy and smooth all at the same time. Made to serve a handful of people, it only takes a few moments to complete. Moms love it and kids enjoy the taste and texture.
To start, puree 1 cup of strawberries in blender until smooth.
In a mixing bowl, combine whipping cream and powdered sugar until smooth.
In a different bowl, beat cream cheese until smooth then add the pureed strawberries.
Finally, add the whipped cream mixture to the cream cheese and strawberries. Stir all the components together until they reach the desired consistency before serving with fresh fruit.
It’s easy, fresh and delicious. Your kids can help you combine all the ingredients and excitedly try the sweet result.
Find more sweet recipes at Culinary.net.
If you made this recipe at home, use #MyCulinaryConnection on your favorite social network to share your work.
Watch video to see how to make this recipe!
Strawberry Mousse
Servings: 6-8
- 1 cup strawberries, halved
- 2 cups heavy cream
- 1 cup powdered sugar
- 1 package (8 ounces) cream cheese, softened
- assorted fruit, for serving
- In blender, puree strawberries until smooth. Set aside.
- In mixing bowl, whip heavy cream and powdered sugar until fluffy.
- In separate mixing bowl, beat cream cheese until smooth. Add strawberry puree to cream cheese and mix until combined. Add whipped cream and stir until combined.
- Serve in bowl with fruit.

Bacon Banana Bread
(Family Features) Warmer spring weather makes the season a perfect time for families to enjoy brunch together. From classic combinations like bacon and eggs to more extravagant offerings, a brunch spread offers a blank canvas for creativity and opportunities to enjoy your loved ones’ favorite morning noshes.
For your next brunch celebration, whether it’s a special occasion or just an excuse to spend time together, consider adding what may become a new family favorite to the menu. This Bacon Banana Bread combines two morning meal classics in one easy-to-enjoy bite.
Plus, it’s made using Coleman Natural Bacon so you can feel confident you’re feeding your family all-natural pork sourced from American Humane Certified family farmers who raise their animals the way nature intended – 100% crate-free without antibiotics or added hormones. The preparation is simple (just 10 minutes in the kitchen) so you can put this dish together and catch up with loved ones while baking a sweet and savory snack.
For more brunch recipe ideas, visit ColemanNatural.com.
Watch video to see how to make this recipe!

Bacon Banana Bread
Prep time: 10 minutes
Cook time: 70-80 minutes
Servings: 6-8
- Nonstick cooking spray
- 1 1/4 cups all-purpose flour, divided
- 1 teaspoon baking soda
- 1 teaspoon baking powder
- 1 cup sugar
- 3 medium bananas, mashed
- 1/2 cup canola oil
- 2 eggs
- 1 teaspoon vanilla extract
- 8 slices Coleman Natural Bacon, cooked and cut into 1/4-1/2-inch pieces
- Preheat oven to 325 F. Lightly grease 9-by-5-inch loaf pan with nonstick cooking spray.
- In large bowl, combine 1 cup flour, baking soda, baking powder and sugar. In separate bowl, combine mashed bananas, canola oil, eggs and vanilla extract.
- Add banana mixture to dry ingredients, stirring until just combined.
- In small bowl, toss bacon and remaining flour until bacon is lightly coated.
- Fold flour-coated bacon into batter. Pour batter into prepared loaf pan.
- Bake 70-80 minutes, or until toothpick inserted near center comes out clean.
- Cool in pan on wire rack 20 minutes before inverting bread onto wire rack to cool completely.
- Cut and serve.
Source: Coleman Natural Foods

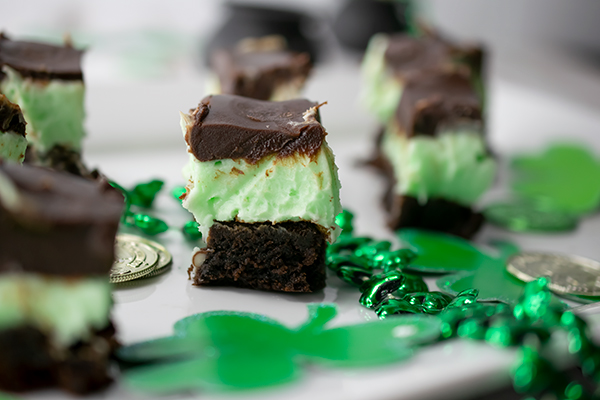
Mint Brownies
(Culinary.net) How lucky you must be to come across this recipe just in time for St. Patrick’s Day. This one is a twisted combination of mint and sweet chocolate that’s sure to have almost anyone’s taste buds screaming “yum.” This dessert might just be the pot of gold at the end of your rainbow this year.
These Mint Brownies have three delicious layers. First, a supreme brownie on bottom. Then a fluffy, green mint layer that’s full of flavor and color. Last, but definitely not least, a chocolate layer on top made with chocolate chips, butter and a little whipping cream.
All of these layers create a smooth, sweet, minty, bite-sized dessert perfect for any occasion but especially St. Patrick’s Day. The green mint color really pops off the plate, giving it some extra flare and an appetizing glow.
To start, create the soft, chocolate filled brownie. Combine brownie mix, vegetable oil, one egg, water and the chocolate syrup pouch. Bake and cool completely.
Then it’s time for some colorful, festive fun. Make the filling with powdered sugar, butter, whipping cream, softened cream cheese, a splash of peppermint extract and a few drops of green food coloring. Beat and pour over the cooled brownie pan.
The last layer is simple. In a saucepan, melt whipping cream, chocolate chips and butter until smooth. When it’s cooled to lukewarm, pour it over the filling for the final layer.
Refrigerate the Mint Brownies for two hours before serving. Cut them into bite-size pieces for small chunks that will melt in your mouth.
Find more seasonal dessert recipes at Culinary.net.
Watch video to see how to make this recipe!
Mint Brownies
Servings: 9-12
- Nonstick cooking spray
- 1 box supreme brownie mix with chocolate syrup pouch
- 3 tablespoons water
- 1/3 cup vegetable oil
- 1 egg
Filling:
- 3 1/2 cups powdered sugar
- 1/4 cup butter, softened
- 1/4 cup whipping cream
- 5 ounces cream cheese, softened
- 1/2 teaspoon peppermint extract
- 5 drops green food color
Topping:
- 1/2 cup whipping cream
- 1 bag (12 ounces) chocolate chips
- 1/2 cup butter
Heat oven to 350 F.
- Spray 8-by-8-inch pan with nonstick cooking spray.
- In large bowl, mix brownie mix, water, oil and egg until combined. Pour into prepared baking pan. Bake 35 minutes. Cool completely, about 1 hour.
- To make filling: In large bowl, beat powdered sugar, butter, whipping cream, cream cheese, peppermint extract and food coloring. Spread over cooled brownies. Refrigerate 1 hour, or until set.
- To make topping: In saucepan, melt whipping cream, chocolate chips and butter until smooth. Cool until lukewarm, about 10 minutes. Pour over filling; spread to cover. Refrigerate 2 hours, or until set.
- Before serving, let brownies set 10 minutes at room temperature.
Tips: Cut brownies with wet knife for cleaner cuts. Store covered in refrigerator.

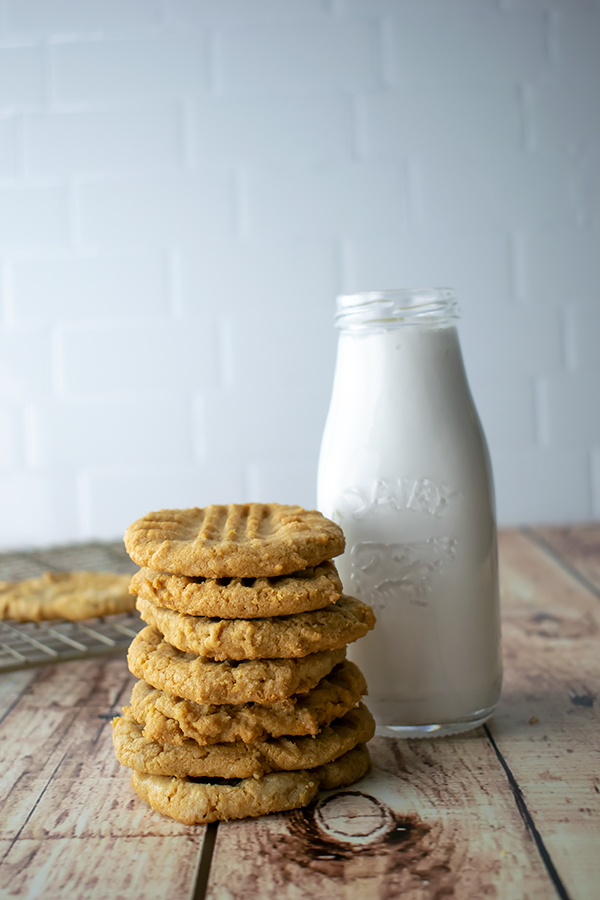
Flourless Peanut Butter Cookies
(Family Features) Whether it’s a home-cooked meal, a tasty snack or a delicious dessert, sometimes the best recipes are the easiest. Take your sweets to the next level by adding an option to your cookbook that’s as simple as it is tempting and satisfying.
These Flourless Peanut Butter Cookies require only three everyday ingredients that can be prepped and baked in less than half an hour. Just preheat the oven; mix the peanut butter, sugar and one egg; roll into individual balls then flatten on a cookie sheet and bake 10 minutes.
The key ingredient is the flavorful peanut butter that packs a protein punch while delivering the taste that’ll bring loved ones back for seconds.
Find more ways to incorporate peanuts and peanut butter into your desserts at gapeanuts.com.
Watch video to see how to make this recipe!
Flourless Peanut Butter Cookies
Prep time: 20 minutes
Cook time: 8-10 minutes
- 1 cup peanut butter
- 1 cup granulated sugar
- 1 large egg
- Preheat oven to 350 F.
- In bowl, combine peanut butter, sugar and egg.
- Using small cookie scoop, place dough balls on parchment paper-lined cookie sheet. Flatten with fork to make traditional peanut butter cookie crisscross pattern.
- Bake 8-10 minutes until done. Cool thoroughly before removing from cookie sheet. Store in air-tight container.
Source: Georgia Peanut Commission

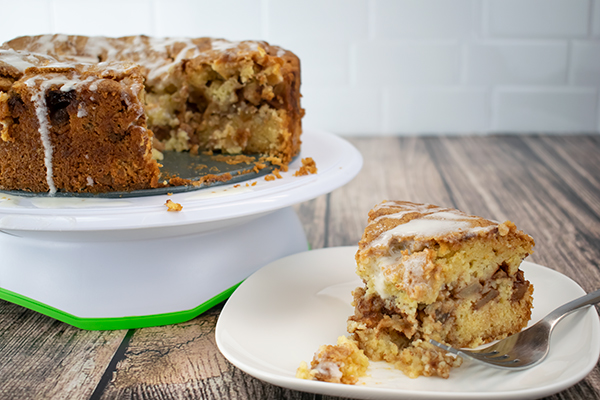
Apple Cake
(Culinary.net) It’s almost impossible to beat the combination of sweet fruit and decadent desserts. This delicious recipe for Apple Cake highlights the crisp fruit but also the cinnamon sugar-flavored pastry. It’s luscious but doesn’t overdo it on the sweet meter with just the right mix of flavors.
The cake is baked with the apples inside as the middle layer, which creates a moist, finished product. The apples are gooey, baked in a cinnamon sugar coating, making them a sweet and light complement to the perfectly baked cake.
Start by mixing the apples with cinnamon and, of course, sugar. Set the mixture aside. Now it’s time for cake. First, mix all the dry ingredients together then mix in the wet ingredients.
The secret to this cake is creating layers that will hold up. Pour half of the batter into a round springform pan first then add apple mixture and top it all with the rest of the cake batter.
Finally, for a little extra sweetness, sprinkle 1 tablespoon of sugar over the top of the cake before baking.
Once baked, this cake can be drizzled with icing (if you’d like) to make it an even more delightful treat to satisfy any sweet tooth.
This cake is perfect for any get-together, families looking for an after-dinner indulgence or anyone who just loves fruity desserts. It’s delectable enough for fancy occasions, but also simple enough to make at home for just a couple.
With fluffy cake layers and a soft apple center, this cake does it all. Not to mention the drip of icing at the end that all but guarantees everyone will be asking for seconds.
Find more recipes and sweet desserts at Culinary.net.
Watch video to see how to make this recipe!
Apple Cake
Servings: 8-16
- 3 cups Honeycrisp apples, peeled, cored and diced
- 3 teaspoons cinnamon
- 6 tablespoons, plus 2 cups, sugar, divided
- 3 cups flour
- 3 teaspoons baking powder
- 1 teaspoon salt
- 1 cup oil
- 4 eggs, beaten
- 1/4 cup orange juice
- 1 teaspoon vanilla
- icing (optional)
- Heat oven to 350 F.
- In medium bowl, mix apples, cinnamon and 5 tablespoons sugar until combined. Set aside.
- In large bowl, mix flour, 2 cups sugar, baking powder and salt until combined. Form well in middle of mixture. Add oil, eggs, orange juice and vanilla; mix until blended.
- In springform pan, pour half of batter. Add apple mixture. Pour remaining batter over apple mixture. Sprinkle remaining sugar over batter.
- Bake 40-50 minutes, or until top is golden brown and tester comes out clean and dry.
- Drizzle with icing, if desired.

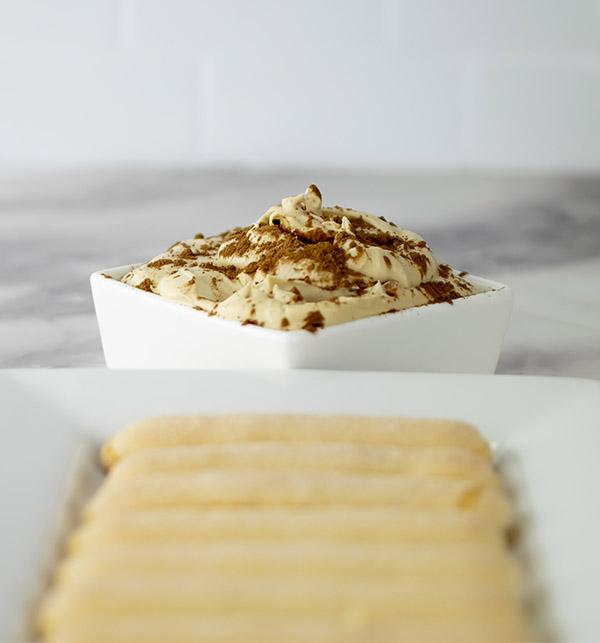
Easy Tiramisu Dip
(Culinary.net) Do you know that moment when something sweet hits your taste buds and a smile instantly spreads across your face? It’s almost magic to some. To others it’s just simply bliss. This holiday season, try something that’s simple yet sophisticated for an easy way to ensure smiles all around.
Try an Easy Tiramisu Dip because whether you’re relaxing at home, having a small get-together with friends or joining your annual family gathering virtually, this dip is sure to spread culinary cheer.
The recipe starts with “easy,” and it holds true to its name. With a short list of ingredients and only a handful of instructions, this is something you can whip up (literally) in just a few moments. Also, using minimal tools in the kitchen is always a plus for at-home chefs. The only appliance needed to make this recipe is a mixer.
The outcome is fluffy, rich and sweet with a hint of espresso. It’s not overpowering, however, so little ones or non-coffee lovers can still enjoy this delicious dip.
This is also a unique dessert because it can be served cool or chilled. If you are planning to take a sweet treat to a party this holiday season, this is nearly perfect. No oven time needed and simple to serve to kids and adults alike.
Serve with ladyfingers or fruit to bring that sweetness to a whole new level, and it’s topped with a final sprinkle of cocoa powder to give it that extra appeal. You do eat with your eyes first after all.
Give this one a try and see the faces of your loved ones light up with joy this season. This creamy, tasty dip is sure to impress.
For more easy dessert recipes, visit Culinary.net.
Watch video to see how to make this recipe!
Easy Tiramisu Dip
Servings: 4
- 1 cup heavy whipping cream
- 1 tablespoon espresso powder
- 4 ounces cream cheese, softened
- 8 ounces Mascarpone cheese
- 1/2 cup powdered sugar
- 1 teaspoon vanilla extract
- 2 teaspoons cocoa powder
- wafers or fruit, for dipping
- In medium bowl, whisk heavy whipping cream and espresso powder until blended.
- In large bowl, use hand mixer to beat cream cheese until smooth. Add Mascarpone cheese and beat until combined. Gradually add powdered sugar, beating after each addition. Add vanilla extract; beat mixture. Add espresso mixture; beat until soft peaks form.
- Keep refrigerated until ready to serve.
- Spoon mixture into serving bowl. Sprinkle with cocoa powder. Serve with wafers or fruit.

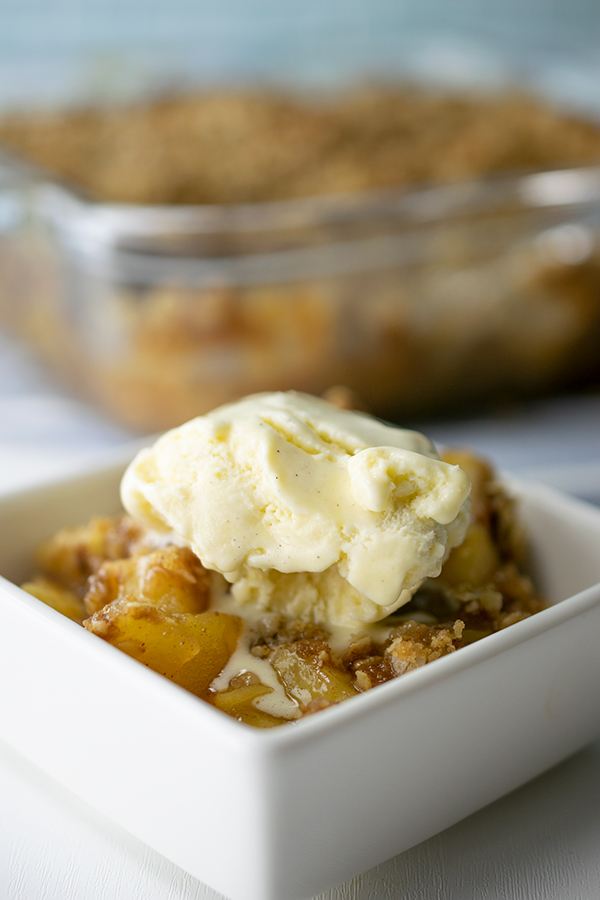
Spiced Apple Crumble
Apple orchards, apple picking and apple desserts all scream fall. Glowing with bright yellows and reds, apples are juicy and more than ready to be used in your favorite fall recipes. If you’re looking for something sweet and full of texture that can turn your taste buds upside down, look no further.
This scrumptious Spiced Apple Crumble is not only a family favorite but a holiday must-have. It’s the perfect dish to pack up and deliver to your next gathering of loved ones. Kids and adults love the deliciously sweet apple chunks filling the bottom of the pan along with the crumble topping. Top this killer sweet treat with vanilla ice cream for a sensational, melty, oozing-with-goodness dessert no one can forget.
It’s one of those recipes your friends will call you about after the gathering wondering “where did you get that recipe?” The best part: It’s perfect for crowds of any size. The bite-size chunks of apple and oats are appetizing for any sweet tooth.
The fall season leading up to the holidays is one of the times of year family and friends traditionally come together most. Nearly everyone loves a satisfying apple, especially when it is baked to perfection, covered with a crumble and topped with creamy, cool vanilla ice cream. Not to mention the splash of lemon added to this mixture brings out a unique tart twist.
Make your next fall festivity or holiday gathering just a little sweeter for all. Spice things up then cool things down. This dessert does it all in just one bite.
Find more recipes for the fall season and holiday fun at Culinary.net.
Watch video to see how to make this recipe!
Spiced Apple Crumble
Servings: 6-8
Filling:
- 6 medium Honeycrisp apples, peeled and cubed
- 1 tablespoon white flour
- 1/2 cup white sugar
- 1/2 teaspoon ground cinnamon
- 1/4 teaspoon ground cloves
- 2 lemons, juice only
Topping:
- 1 cup quick oats
- 1 cup white flour
- 1/2 cup light brown sugar
- 1/2 cup dark brown sugar
- 1/2 teaspoon baking powder
- 1 teaspoon cinnamon powder
- 1/2 cup unsalted butter, melted
- 1/8 teaspoon salt
- vanilla ice cream (optional)
- Preheat oven to 350 F.
- To make filling: In medium bowl, add apples, flour, sugar, cinnamon, cloves and lemon juice. Toss to evenly coat. Spread evenly in 8-by-8-inch baking dish.
- To make topping: In medium bowl, add oats, flour, brown sugars, baking powder, cinnamon, melted butter and salt. Fork mixture to create crumbles. Pour crumble topping over apple mixture.
- Bake 30-40 minutes, or until golden brown. Let stand 10 minutes before serving.
- Serve warm with vanilla ice cream.