
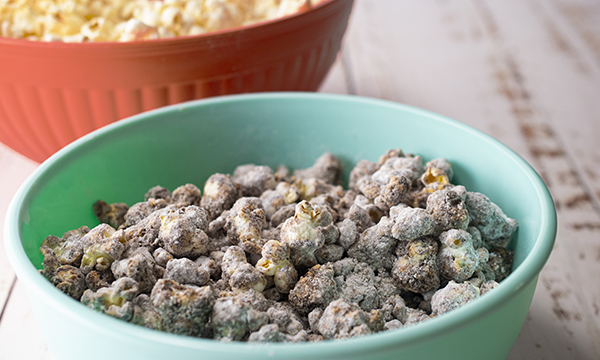
Poppy Chow
(Family Features) No matter the occasion, nearly every gathering of loved ones is better with snacks.
One opportunity to celebrate this winter, National Popcorn Day on Jan. 19, honors one of America’s oldest and most beloved snack foods. Perfect served by itself or as an ingredient in whole-grain creations like Poppy Chow, a twist on a classic kid’s favorite made with peanut butter, chocolate and popcorn.
With no artificial additives or preservatives, light and airy popcorn is naturally low in fat and calories, non-GMO and gluten free, making it a sensible option to satisfy cravings for something savory, sweet and just about every flavor in-between. Plus, whole-grain popcorn has energy-producing carbohydrates and fiber, which can help keep you satisfied longer.
Visit Popcorn.org for more tasty snack recipes worth celebrating.
Watch video to see how to make this recipe!
Poppy Chow
Yield: 2 quarts
- 2 quarts popped popcorn
- 1/4 cup (1/2 stick) butter or margarine
- 1/2 cup creamy peanut butter
- 1 cup milk or semi-sweet chocolate chips
- 1 cup confectioners’ sugar
- Place popcorn in large bowl; set aside.
- In microwave safe bowl, combine butter, peanut butter and chocolate chips.
- Microwave 2 minutes; stir until smooth.
- Pour chocolate mixture over popcorn and stir until well coated.
- Sprinkle confectioners’ sugar over popcorn and stir until coated.
- Cool to room temperature before serving.
- Store in airtight container, refrigerated, up to 24 hours.
Source: Popcorn.org

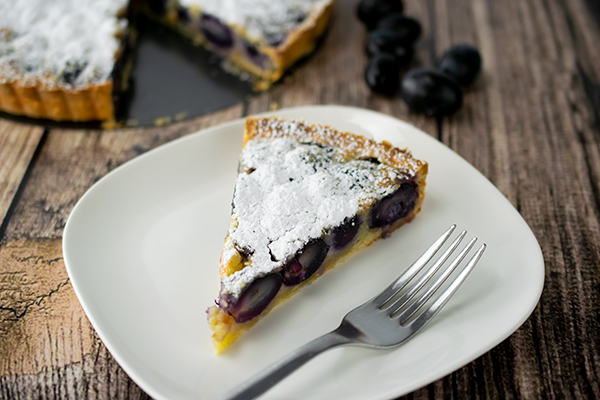
Grape Frangipane Tart
(Family Features) All kinds of holiday celebrations, whether with immediate family or joining loved ones virtually, can be made better with sweet treats that add special meaning to the occasion. Including fresh fruit in your treat can make it an even tastier take on seasonal tradition.
For example, fresh California grapes are available into January and are perfect for the holiday season. Enjoy them as a fresh, healthy snack or side dish, or as an ingredient to add taste and visual appeal to recipes to make the season feel special.
This Grape Frangipane Tart offers a simple solution when your sweet tooth calls for a dish to share with family. Everyday ingredients likely already in your pantry combine with fresh grapes for a sweet-tart twist worthy of the holidays.
Find more holiday dessert recipes at grapesfromcalifornia.com.
Watch video to see how to make this recipe!
Grape Frangipane Tart
Servings: 10
- 1 tart pastry, single crust (10 inches)
- 3 1/2 cups red or black seedless California grapes
- 2 ounces almond paste
- 1 large egg
- 1/4 cup sugar
- 1/4 cup butter
- 2 tablespoons flour
- 1 pinch salt
- confectioners’ sugar
- Preheat oven to 375 F.
- Line 10-inch tart pan with pastry. Arrange grapes snugly in decorative rings in pastry. With electric mixer, combine almond paste, egg, sugar, butter, flour and salt until smooth to create frangipane. Carefully spread over arranged grapes and bake 35 minutes until tart is golden brown and cooked through.
- When tart is cool, remove from pan and dust with confectioners’ sugar.
Nutritional information per serving: 151 calories; 2 g protein; 8 g fat; 46% calories from fat; 19 g carbohydrates; 34 mg cholesterol; .8 g fiber; 86 mg sodium.

Mother's Day Delights
(Family Features) The Mother's Day brunch is arranged, the cards and flowers are picked out - now it's time to make a show-stopping dessert that will truly make her day. And it's easier than you might think.
When looking for the perfect way to treat mom on Mother's Day, try a simple search on Bing.com. Bing makes it easy to find recipes by meals, convenience, or even ingredients to find just the right recipe - like cheesecake, pie or blackberry cobbler - to truly delight the special mom in your life.
Show your mom just how much she means to you by making her something special and giving her a Mother's Day she won't forget. Here are three delicious ideas.
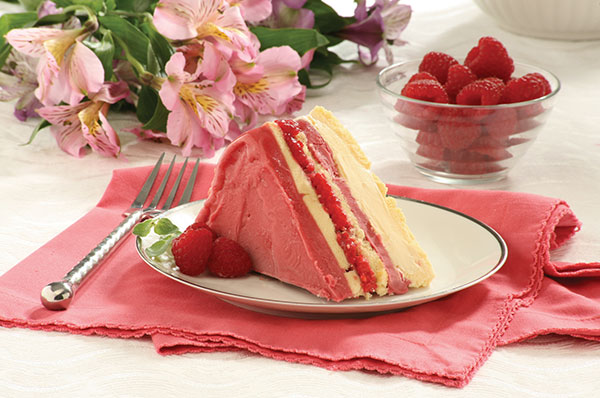
Frozen Raspberry Layer Cake
From Country Living
Prep Time: 20 minutes (not counting freezing times)
Total Freezing Time: 4 hours+
Servings: 8 to 10
- 2 10 3/4-ounce frozen pound cakes, crusts removed, sliced into 1/4-inch-thick slices
- 3 cups vanilla ice cream, slightly softened
- 4 cups raspberry sorbet, slightly softened
- 1 pint fresh raspberries, rinsed and picked over
- 3 tablespoons Chambord, or other raspberry-flavored liqueur
- Prepare the pan: Trace and cut out a 9-inch circle from parchment paper and fit it into the bottom of a 9-inch springform pan.
Cut out a 3- by 27-inch strip of parchment and fit around inside of pan. Tape to secure parchment paper and set aside. - Assemble the cake: Cover bottom of pan with a single layer of pound cake slices and spread ice cream evenly over cake. Freeze until ice cream hardens - about 25 minutes.
- Spread 2 cups sorbet over ice cream, followed by another layer of pound cake slices. Return cake to freezer for 10 minutes.
- Combine raspberries and Chambord together in small bowl. Remove cake pan from freezer and place berries evenly over cake.
- Top with a final layer of pound cake and remaining sorbet. Wrap tightly with plastic wrap and freeze until firm - at least 4 hours.
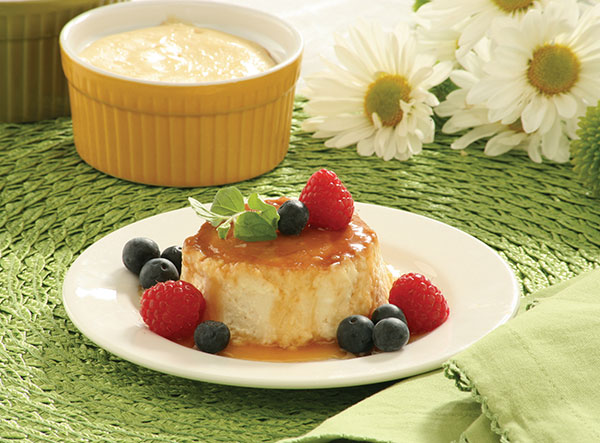
Upside-Down Honey Cheesecakes
From Bon Appétit
Prep Time: 25 minutes
Cook Time: 35 minutes
Chilling Time: 1 hour+
Servings: 12
- 1 cup sugar
- 1/3 cup honey
- 1/4 cup (1/2 stick) unsalted butter
- 1/3 cup water
- 3 8-ounce packages cream cheese, room temperature
- 2/3 cup (packed) golden brown sugar
- 1 cup sour cream
- 2 teaspoons fresh lemon juice
- 2 teaspoons vanilla extract
- 4 large eggs, room temperature
- Assorted fresh berries (for garnish)
- Preheat oven to 300°F. Butter twelve 3/4-cup ramekins or custard cups.
- Place 1 cup sugar, honey, and butter in heavy medium saucepan. Stir over medium heat until butter melts and mixture is blended.
Increase heat to medium-high and bring to boil. Whisk until mixture darkens slightly and candy thermometer registers 300°F, about 5 minutes. - Remove from heat; add 1/3 cup water (mixture will bubble vigorously); whisk to blend. Divide topping among ramekins (about 2 tablespoonfuls for each). Divide ramekins between 2 roasting pans and chill while preparing filling.
- Using on/off turns, blend cream cheese and brown sugar in processor, scraping bowl occasionally. Add sour cream, lemon juice, and vanilla; process until smooth. Add eggs 1 at a time, processing just to blend between additions. Divide filling among ramekins.
Add enough hot water to pans to come halfway up sides of ramekins. - Bake cheesecakes until set, about 35 minutes. Remove from roasting pans and chill until firm, about 1 hour. DO AHEAD: Can be made 2 days ahead. Cover and keep chilled.
- Run thin knife around sides of ramekins. Invert onto plates, scooping any remaining topping from ramekins over cheesecakes. Garnish with berries.

Strawberry Shortcake Cupcakes
From Redbook
Prep Time: 25 minutes
Cook Time: 24 minutes
Servings: 12
- 1 1/3 cups all-purpose flour
- 1/2 teaspoon baking powder
- 1/2 teaspoon baking soda
- 1/4 teaspoon salt
- 1/2 cup unsalted butter, softened
- 2/3 cup granulated sugar
- 2 large eggs
- 1 1/2 teaspoons vanilla extract
- 2/3 cup sour cream
Topping
- 1 quart strawberries, hulled, thickly sliced
- 1/3 cup granulated sugar
- 1 tablespoon lemon juice
- 1 1/2 cups cold heavy cream
- 3 tablespoons confectioners' sugar
- 1 tablespoon vanilla extract
- Heat oven to 350° F. Line 12 standard muffin cups with paper liners.
- In medium bowl, whisk flour, baking powder, baking soda, and salt. In large bowl with mixer on medium, beat butter and sugar until light and creamy. Beat in eggs, 1 at a time, then vanilla. With mixer on low, alternately beat in flour mixture and sour cream until combined. Continue to beat on medium until batter is thick and smooth.
- Spoon batter into a zip-top bag. Snip a 1/2-inch corner from bag and fill liners slightly less than two-thirds full. Bake 24 to 26 minutes, or until lightly golden and a pick inserted in the center of a cupcake comes out clean. Cool in pan on a wire rack 5 minutes; remove cupcakes from pan and cool completely.
- Toss strawberries several times in a bowl with sugar and lemon juice until very syrupy. In large bowl, beat cream, confectioners' sugar, and vanilla until soft peaks form.
- Use a skewer to poke several holes into top of each cupcake. Spoon some syrup from bowl over top, allowing it to absorb into cupcakes. Top with sliced berries and a dollop of cream. Arrange a few sliced berries in cream and drizzle with remaining strawberry syrup.
Source: Bing.com

Sundaes 101
(Family Features) When a trip to the ice cream parlor isn't in the cards, bring the ice cream parlor home with DIY sundaes! Making the perfect sundae might look like a hefty task, yet with a little creativity this all-American dessert is one of the easiest to make. By offering an assortment of ice cream flavors and toppings, everyone in the family can concoct their own personalized combinations.
There is no wrong way to craft this ice cream dessert, but read on for tips that will help you recreate the ice cream parlor in your kitchen.
Dishes. Glass bowls are traditional favorites, but be imaginative and rummage through your forgotten dishes to find something special. Chill the dishes for 30 minutes in the freezer to keep the ice cream from melting while creating your sundae.
Ice cream. Pick ice cream flavors that go well together or use vanilla, which tastes great with everything. Scoop the ice cream with a slightly warmed metal scoop to make it easier.
Mix-ins. From crushed cookies to gummy bears, there is no limit to what can go in a sundae. Fruit and chocolate chips are popular toppings and toasted nuts provide a crunchier texture. Create a mix-in buffet by placing all the goodies on the kitchen counter with a bowl and a spoon for each.
Toppings. Once dishes are filled with ice cream and mix-ins, drizzle syrup over top. Caramel, chocolate, strawberry, peppermint and English toffee are popular choices. Don't forget the whipped cream and cherry, if desired. Sprinkles, malt powder and mint leaves make good finishing touches as well.
Dig in! Long-handled spoons are great - they are ideal for scooping out everything, right down to the bottom. And remember kids love colorful spoons with funny characters or motifs on them.
Try these sundae recipes for creative combinations. For more summer sundae ideas, visit www.BlueBunny.com.

Caribbean Sundae
Makes 4 servings
- 1/2 cup canned crushed pineapple in juice, drained
- 1/2 cup chopped mango, thawed if frozen
- 2 cups Blue Bunny Premium Vanilla Ice Cream
- 8 teaspoons unsweetened shredded coconut, toasted
- 1 teaspoon grated lime peel
- 4 slices fresh lime
- Place one tablespoon crushed pineapple and one tablespoon chopped mango into each of four small parfait glasses. Top with quarter cup ice cream. Sprinkle with one teaspoon of toasted coconut. Repeat layering. Top each parfait with one-fourth teaspoon grated lime peel.
- Garnish rim of each parfait glass with a slice of lime. Serve immediately.
Cinnamon Bun Hot Apple Sundae
Makes 8 servings
- 1 4-inch frosted cinnamon roll
- 3 1/2 cups Blue Bunny Premium Vanilla Ice Cream, softened
- 1/2 cup glazed walnuts
- 1 can (21 ounces) apple pie filling
- 1/2 cup butterscotch-caramel topping
- Glazed walnuts, optional
- Cut cinnamon roll into half-inch pieces; set aside quarter cup for topping.
- Combine three cups of ice cream, cinnamon roll pieces (not reserved amount) and half cup glazed walnuts in large bowl; gently mix to combine. Freeze at least two hours.
- Warm apple pie filling in microwave-safe container or in small saucepan over medium-low heat. Spoon about one-third cup apple pie filling into eight serving bowls.
- Top each bowl with one scoop (scant half cup) of the ice cream. Drizzle each with one tablespoon butterscotch-caramel topping, several pieces of reserved cinnamon roll and glazed walnuts, if desired. Serve immediately.
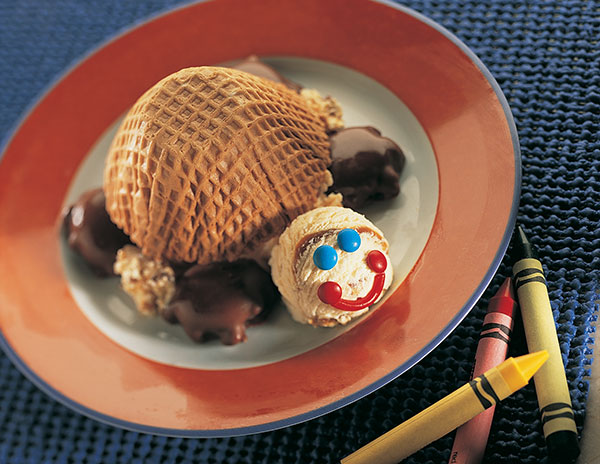
Turtle Sundae
Makes 4 servings
- 4 3 1/2-inch waffle bowls
- 5 cups Blue Bunny Premium Homemade Turtle Sundae Ice Cream
- 16 chocolate Turtle candies
- Assorted candy, for facial features
- 1 1.5-ounce package chocolate covered crisp wafer stick candy, such as Pepperidge Farm Pirouettes
- Form four scoops of ice cream and set aside. Fill each waffle bowl with remaining ice cream. Place each waffle bowl ice cream side down on an individual dessert plate. Place each of the four ice cream scoops that were set aside against each waffle bowl for the turtles' heads.
- Arrange four turtle candy pieces partially under the bottom of each waffle bowl to form the turtles' legs. Press assorted candy pieces into ice cream scoops for eyes and mouth. Place one chocolate wafer stick partially under waffle bowl for tail. Serve immediately.
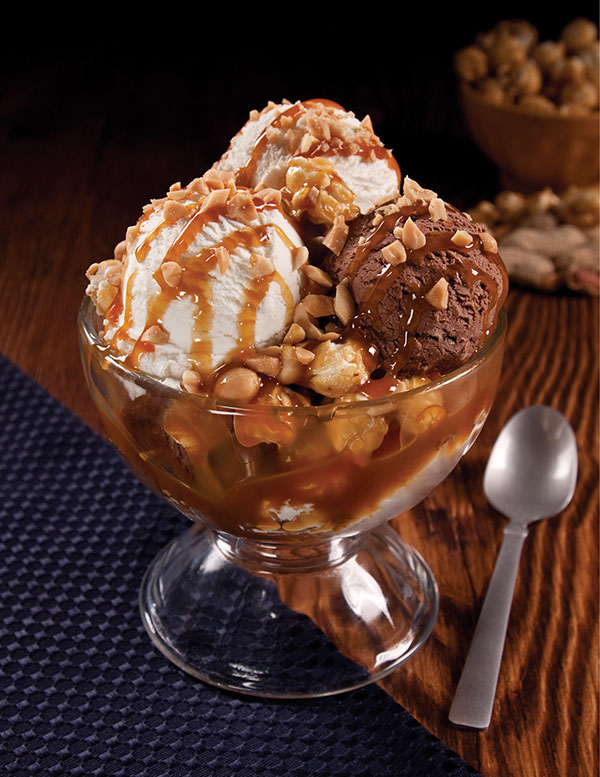
Caramel Corn Sundae
Makes 4 servings
- 2 cups (each) Blue Bunny Vanilla, Chocolate and Butter Pecan Ice Cream
- 3 cups caramel corn
- 1/4 cup caramel sauce
- 1/4 cup toasted peanuts
- Scoop vanilla ice cream onto frozen parchment-lined sheet pan. Repeat with chocolate and butter pecan ice cream. Using rubber gloves, coat each ice cream scoop with caramel corn. Repeat until all ice cream scoops are coated. Layer scoops in a sundae glass with peanuts and caramel sauce. Serve immediately.
Source: Blue Bunny Ice Cream

Sweetness Made Simple
(Family Features) It's time to enjoy summer entertaining with easy, no-bake desserts that let you relax and enjoy time with friends and family while your creations are chilling in the fridge. To help you keep your cool, Eagle Brand(r) Sweetened Condensed Milk is sharing expert tips and recipes to satisfy your family, friends and guests alike without ever turning on the oven.
Foolproof Ice Cream: Homemade ice cream is easy to make with Eagle Brand Sweetened Condensed Milk. It lends a rich, thick consistency, so no eggs are required - and you don't need an ice-cream maker, either. Try this luscious Butter Pecan Ice Cream recipe, or use your favorite fruit, candy pieces, nuts or coffee to create your own delicious and refreshing ice cream flavors.
Make It Mini: Mini desserts are perfect for summer parties - small, bite-sized treats are easy to handle and let guests enjoy something sweet without feeling like they're overindulging. Try different variations of Creamy Mini Tarts using chocolate, peanut butter or your favorite fruit to satisfy everyone's taste. Also try making mini-size Raspberry Mocha Mousse Parfaits by layering the ingredients in small juice glasses.
Fresh and Fun: Make the most of the season's freshest flavors with this Fresh Fruit Cream Cheese Pie. Mix and match your favorites for a show-stopping dessert.
Sweet Inspiration: If life hands you lemons, make easy, no-bake party desserts. When combined with acidic fruit juice from a lemon or lime, Eagle Brand Sweetened Condensed Milk thickens - without heating - to form velvety pie fillings, puddings and other desserts. Get inspired and whip up these Creamy Mini Tarts.
To get more easy dessert recipes, see how-to videos, and to download a free recipe book, visit www.eaglebrand.com.
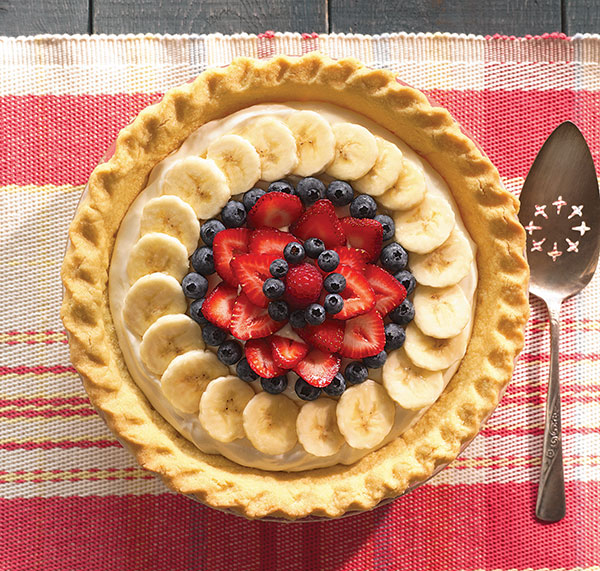
Fresh Fruit Cream Cheese Pie
Prep Time: 10 Minutes
Chilling Time: 3+ hours
Yield: 8 servings
- 1 8-ounce package cream cheese, softened
- 1 14-ounce can Eagle Brand Sweetened Condensed Milk OR 1 14-ounce can Eagle Brand Low Fat Sweetened Condensed Milk
- 1/3 cup lemon juice
- 1 teaspoon vanilla extract
- 1 9-inch frozen deep-dish pie crust, baked
- Fresh fruit (blueberries, strawberries, bananas*)
- Seedless red raspberry jam
- BEAT cream cheese in large bowl with an electric mixer until fluffy. Gradually beat in sweetened condensed milk until smooth. Stir in lemon juice and vanilla. Pour into baked pie crust.
- REFRIGERATE 3 hours or until set. Arrange fruit on top of pie. If coating berries, stir jam until smooth. Brush berries with jam and serve.
*If using bananas, dip in lemon juice before placing on pie to keep them from turning brown. Do not coat with jam.
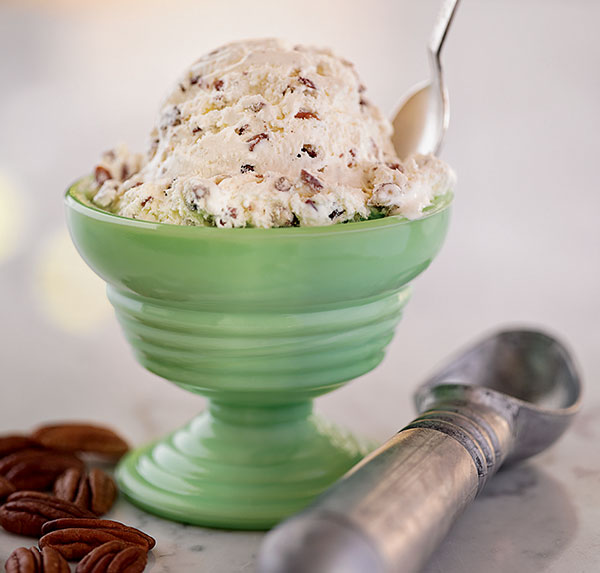
Butter Pecan Ice Cream
Prep Time: 15 minutes
Freezer Time: 6+ hours
Yield: 1 3/4 quarts
- 2 cups heavy cream
- 1 14-ounce can Eagle Brand Sweetened Condensed Milk
- 1 to 1 1/2 cups chopped pecans, toasted*
- 3 tablespoons butter, melted
- 1 teaspoon maple extract
- WHIP heavy cream to stiff peaks in large bowl. Combine sweetened condensed milk, pecans, butter and maple flavoring in large bowl. Mix well. Fold in whipped cream.
- POUR into 9 x 5-inch loaf pan or 2-quart container; cover. Freeze 6 hours or until firm. Store in freezer.
*To toast nuts: Place nuts in dry nonstick skillet. Cook over medium heat, shaking pan until nuts are lightly browned. To avoid over-browning, remove from pan immediately.
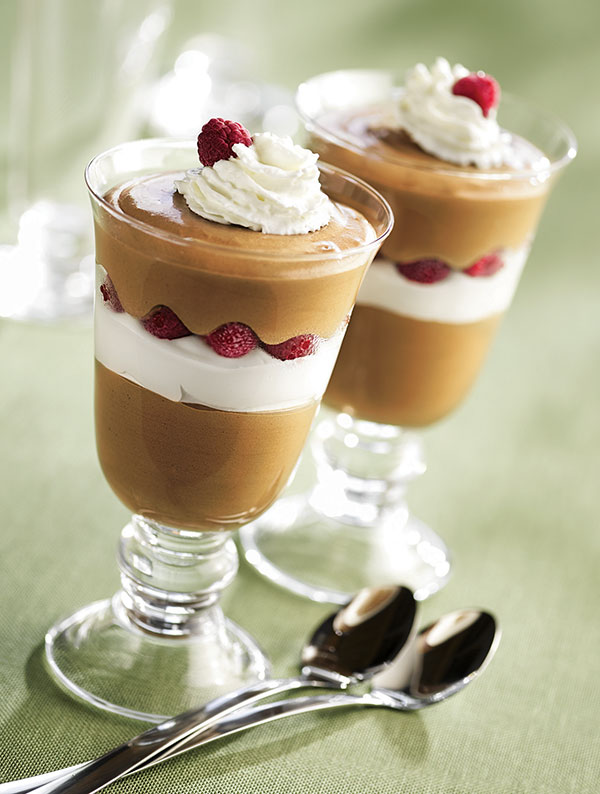
Raspberry Mocha Mousse Parfaits
Prep Time: 40 Minutes
Chilling Time: 20 Minutes
Yield: 8 servings
- 4 1-ounce squares unsweetened chocolate
- 1 14-ounce can Eagle Brand Sweetened Condensed Milk
- 1 1/2 teaspoons vanilla extract
- 1 tablespoon Folgers® Instant Coffee Crystals
- 1 teaspoon hot water
- 1 cup (1/2 pint) heavy cream
- 1 can refrigerated whipped cream
- 2 cups Nature's Peak® Frozen Raspberries OR 2 cups fresh raspberries
- MELT chocolate in a microwave-safe dish on HIGH (100% power) in 20 second intervals until melted. Stir until smooth.
- POUR sweetened condensed milk into large bowl. Beat in melted chocolate and vanilla. Dissolve coffee in hot water. Add to chocolate mixture, beating until smooth. Chill 15 minutes. Chill beaters and mixing bowl from electric mixer 10 minutes in preparation for next step.
- BEAT cream in chilled bowl with chilled beaters until stiff. Fold into chilled chocolate mixture. Reserve 8 raspberries for garnish. Layer parfait glasses as follows: 1/4 cup chocolate mousse, refrigerated whipped cream, 1/4 cup raspberries, 1/4 cup chocolate mousse. Refrigerate parfaits 20 minutes before serving. Just before serving, garnish each with refrigerated whipped cream and a single raspberry.
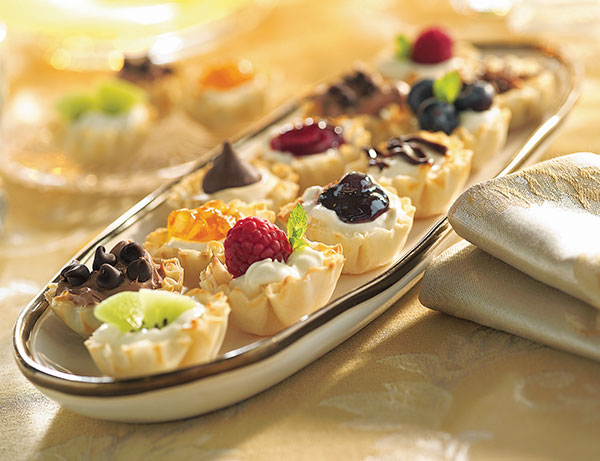
Creamy Mini Tarts
Prep Time: 1 hour
Chilling Time: 2 hours
Yield: 60 mini tarts
- 1 8-ounce package cream cheese, softened
- 1 14-ounce can Eagle Brand Sweetened Condensed Milk
- 1/3 cup lemon juice
- 1 teaspoon vanilla extract
- 4 1.9-ounce boxes mini phyllo shells
- 2/3 cup Smucker's® Blueberry Preserves
- BEAT cream cheese in large bowl until fluffy. Gradually beat in sweetened condensed milk until smooth. Stir in lemon juice and vanilla until blended. Spoon about 2 teaspoons into each mini shell. Refrigerate 2 hours or until firm.
- MAKE a slight indentation in the filling using the back of small round measuring spoon. Fill with 1/2 teaspoon preserves. Refrigerate until ready to serve.
Variations
Fresh Fruit: Top mini tarts with fresh fruit such as strawberries, blueberries, bananas, raspberries, cherries, kiwi, grapes or pineapple. Garnish with mint leaves.
Hot Fudge: Place 2 tablespoons hot fudge topping into corner of resealable plastic bag. Cut small corner off bag. Squeeze to drizzle over top of mini tarts.
Preserves: Use different flavors of preserves or orange marmalade to create a colorful assortment. Garnish with mint leaves.

Deliciously Easy Pumpkin Desserts
Enjoy an organic twist on seasonal sweets
(Family Features) Holidays are typically a joyous time filled with gatherings of friends and family, including time spent baking and enjoying seasonal dishes, all while making fond memories. Pumpkin has become a popular holiday ingredient, making it easy to create pumpkin-centric desserts, perfect for entertaining.
This season, try utilizing organic ingredients in holiday dishes as a simple way to add a better-for-you twist to your family’s favorite dishes – including baked goods and other desserts. The
O Organics product line, exclusive to the Albertsons Companies family of stores including Albertsons, Safeway, ACME Markets, Jewel-Osco, Pavilions, Randalls, Shaw’s, Star Market, Tom Thumb and Vons, includes 100 percent pure organic pumpkin, as well as more than 400 additional USDA-certified, non-GMO items for every occasion, from fresh fruits and vegetables to wholesome dairy, meats, baking ingredients, cereals, snacks and more.
When it comes to the dessert table, try a new twist on pumpkin with these seasonal sweets featuring high-quality, organic ingredients. Use the online store locator to find a store near you and discover more ways to add organic foods to your family’s meals.
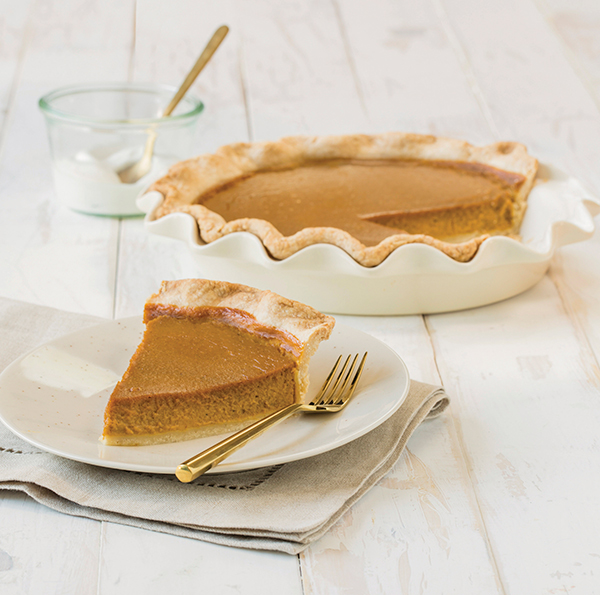
Organic Pumpkin Pie
Prep time: 15 minutes
Total time: 1 hour, 25 minutes
Servings: 8
Crust:
- 1 1/2 cups O Organics all-purpose flour
- 8 tablespoons unsalted butter, slightly softened
- 1 teaspoon kosher salt
- 1 tablespoon O Organics granulated sugar
- cold water, as needed (about 4-6 tablespoons)
Filling:
- 1 can (15 ounces) O Organics 100 percent pure pumpkin
- 1/2 cup whole milk
- 1/2 cup pure maple syrup
- 2 large eggs
- 1 teaspoon O Organics ground cinnamon
- 1/4 teaspoon ground nutmeg
- 1/2 teaspoon O Organics ground ginger
- To make crust: Place flour, butter, salt, sugar and water in large bowl. Using fingers, mix ingredients together until dough ball forms. Flatten into 1-inch thick disk and wrap in parchment paper. Let rest 1 hour in refrigerator before rolling out.
- Heat oven to 375° F. Roll out dough and press into pie plate.
- To make filling: In medium bowl, whisk together pumpkin, milk, syrup, eggs, cinnamon, nutmeg and ginger. Pour into pie plate.
- Bake 40-55 minutes until filling is slightly jiggly but set. Let cool 4 hours. Serve.
Notes: Using measuring cup as scoop for flour actually overfills it. Instead, fill cup lightly with spoon and level off top with butter knife. Do not roll dough all the way to edge to keep dough from sticking to surface. Keep surface and rolling pin floured and continue turning dough. Pie dough can be made and frozen ahead of time for easy use – just thaw in refrigerator before using. It can keep up to 6 months in freezer.
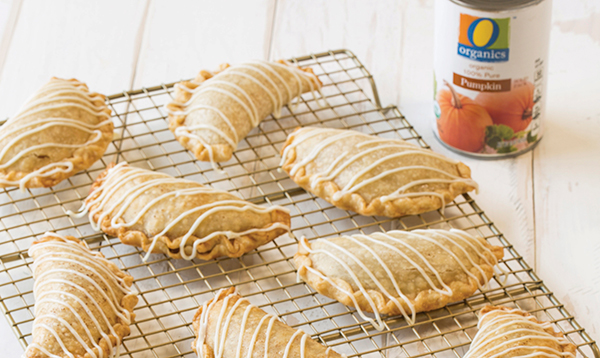
Pumpkin Hand Pies
Prep time: 15 minutes
Total time: 50 minutes
Servings: 6-8
- 1/2 cup O Organics 100 percent pure pumpkin
- 2 ounces cream cheese, softened
- 1 tablespoon pure maple syrup
- 1/8 teaspoon O Organics ground cinnamon
- 1/4 teaspoon pumpkin pie spice
- 1/2 teaspoon vanilla
- 2 premade pie dough crusts, rolled into 10-inch circles
For brushing pastry:
- 1 tablespoon whipping cream
- 1 tablespoon pure maple syrup
- 1/8 teaspoon cinnamon
Icing:
- 4 ounces softened cream cheese
- 1/4 cup powdered sugar
- 1 1/2 teaspoons milk
- Heat oven to 375° F. Using mixer, combine pumpkin, cream cheese, maple syrup, cinnamon, pumpkin pie spice and vanilla until well mixed. Set aside.
- Spread pie dough. Using 5-inch round cutter, make circles. Whisk together whipping cream, maple syrup and cinnamon for brushing.
- Taking round piece of dough, place about 3 tablespoons filling in center and fold dough over to create half-moon shape. Brush edges with whipping cream mixture. Using fork tines, seal edges of pastry. Repeat with each dough circle.
- Place pies on parchment-lined baking sheet. Brush tops with whipping cream mixture. Bake 16-20 minutes until bottoms are golden brown. Let cool 30 minutes.
- To make icing: Whisk to combine cream cheese, powdered sugar and milk. Drizzle over pies. Serve.
Notes: Use lid from small pan to cut dough circles for pies. For easier drizzling, load icing into small zip-top bag. Squeeze into corner and twist top to seal. Cut corner and drizzle over pies.
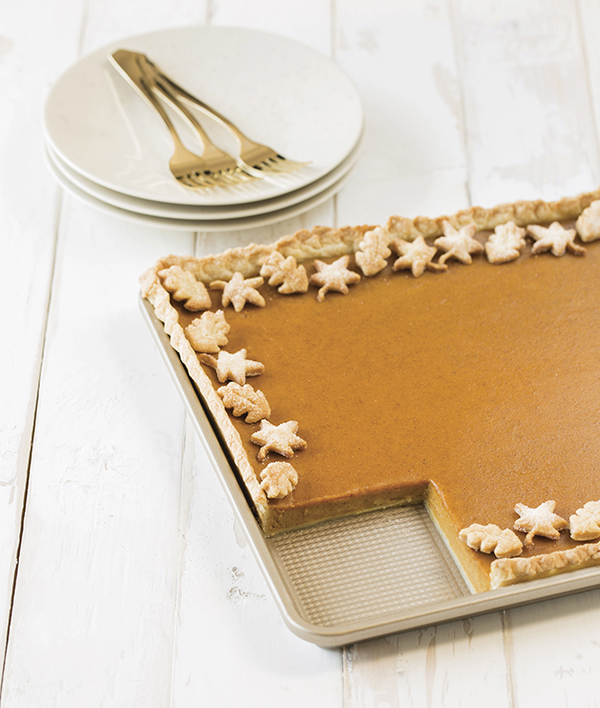
Pumpkin Slab Pie
Prep time: 20 minutes
Total time: 1 hour, 20 minutes
Servings: 36-40
Crust:
- 1 cup unsalted butter, cut into 1/2-inch cubes
- 8 ounces cream cheese, cut into 1/2-inch cubes
- 2 cups all-purpose flour
- 1 teaspoon kosher salt
Filling:
- 2 cans (15 ounces each) O Organics 100 percent pure pumpkin
- 4 eggs
- 2 cups whipping cream
- 1 1/4 cups granulated sugar
- 2 teaspoons pumpkin pie spice
- 1 teaspoon ground ginger
- 1/2 teaspoon kosher salt
- To make crust: In bowl, combine butter, cream cheese, flour and salt. Use fingers to mix ingredients until dough ball forms. Form into two flat rectangular disks about 1-inch thick and wrap with plastic. Refrigerate 1 hour.
- On lightly floured surface, roll out each crust into 13-by-10-inch rectangle. Carefully place dough on each side of 12-by-17-inch pan and pinch together, smoothing out crust so it fits into all corners of pan. Trim edges to 1/2 inch of crust and tuck edges under. Crimp edges with fork.
- Heat oven to 350° F.
- To make filling: In large bowl, whisk to combine pumpkin, eggs, whipping cream, sugar, pumpkin pie spice, ginger and salt. Pour into crust.
- Bake 35-45 minutes until filling is slightly jiggly but set. Let cool 3-4 hours before serving.

Pumpkin Spice Latte Ice Cream
Prep time: 10 minutes
Total time: 10 minutes
Servings: 2
- 1/2 cup frozen pumpkin puree made with O Organics 100 percent pure pumpkin
- 2 frozen bananas, cut or broken into 1-inch chunks
- 1 teaspoon espresso instant coffee granules
- 1 tablespoon cashew butter
- 1 1/2 teaspoons pumpkin pie spice
- 1 teaspoon maple syrup
- Remove pumpkin puree cubes from freezer and allow to soften slightly, about 5 minutes. In food processor or high-powered blender, combine pumpkin puree, bananas, coffee granules, cashew butter, pumpkin pie spice and syrup.
- Pulse until mixture begins to resemble ice cream consistency, about 5 minutes.
Notes: Freeze pumpkin in ice cube trays. Overripe bananas work best. Peel and place on parchment-lined baking sheet in freezer. Once frozen, store in zip-top bag.
Source: Albertsons Companies

Give Thanks for the Slow Cooker
(Family Features) Want to spend more time with loved ones this Thanksgiving? Ditch the perfectly timed oven schedule and put your slow cooker to work. It’ll deliver the familiar flavors of your favorite holiday stuffing, sauces and desserts in a new, more convenient way.
“Take advantage of the hassle-free slow cooker for sides and desserts and leave the oven free for your turkey,” said McCormick Kitchens Executive Chef Kevan Vetter. “Top a mixture of apples, brown sugar and cinnamon with seasoned oat crumbles for a warm Oatmeal Apple Cobbler – an ooey gooey dessert that will fill your kitchen with an irresistible, sweet and spicy aroma while it slow cooks.”
For more time-saving tips and recipes for your Thanksgiving feast, check out McCormick.com and visit McCormick Spice on Facebook and Pinterest.
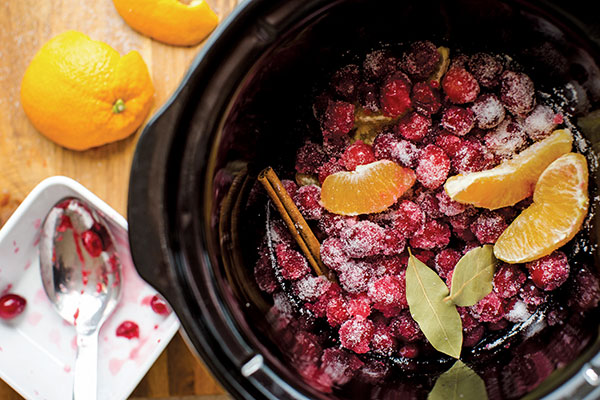
Slow Cooker Cranberry Sauce
Prep time: 5 minutes
Cook time: 3 hours, 45 minutes
Servings: 8
- 1 package (12 ounces) fresh or frozen cranberries
- 2/3 cup sugar
- 1 seedless orange, peeled and sectioned
- 2 McCormick Bay leaves
- 1 McCormick Cinnamon Stick
- Place all ingredients in 4-quart slow cooker. Cover.
- Cook 3 hours on high, stirring every hour. Uncover. Stir well.
- Cook, uncovered, 30 to 45 minutes longer on high or until slightly thickened.
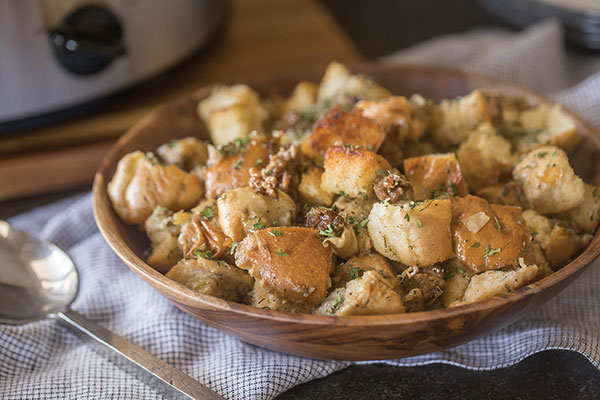
Slow Cooker Sausage Stuffing
Prep time: 15 minutes
Cook time: 1 hour, 25 minutes
Servings: 12 (2/3-cup servings)
- 1/4 cup (1/2 stick) butter
- 2 cups chopped celery
- 1 cup chopped onion
- 1/2 pound mild (sweet) Italian sausage, casing removed
- 1 cup Kitchen Basics Original Chicken Stock
- 2 teaspoons McCormick Rubbed Sage
- 1 teaspoon McCormick Crushed Rosemary
- 10 cups cubed French bread (1-inch pieces)
- Melt butter in large skillet on medium heat. Add celery and onion; cook and stir until softened, about 5 minutes. Add sausage; cook and stir until no longer pink, about 5 minutes.
- Spray inside of slow cooker with no stick cooking spray. Add stock and herbs; stir to blend. Stir in bread cubes and sausage-vegetable mixture. Cover.
- Cook 45 minutes on high. Uncover and stir. Cook, uncovered, 30 minutes longer.
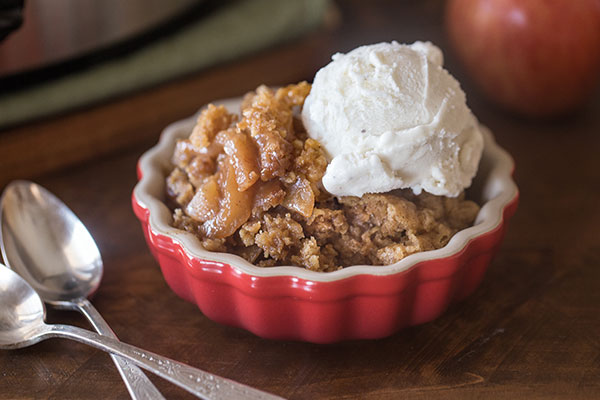
Slow Cooker Oatmeal Apple Cobbler
Prep time: 15 minutes
Cook time: 3 hours
Servings: 10
Apple Filling:
- 5 medium Gala apples, peeled, cored and thinly sliced
- 1 cup firmly packed brown sugar
- 1/4 cup all-purpose baking mix, such as Bisquick
- 1 teaspoon McCormick Ground Cinnamon
Oatmeal Cobbler Topping:
- 1 cup all-purpose baking mix, such as Bisquick
- 1/2 cup quick-cooking oats
- 1/2 cup firmly packed brown sugar
- 1/3 cup granulated sugar
- 1/4 teaspoon salt
- 1/2 teaspoon McCormick Ground Cinnamon
- 1/2 cup (1 stick) cold butter, cut into pieces
- Spray inside of slow cooker with no stick cooking spray. For the Apple Filling, toss apple slices, brown sugar, baking mix and cinnamon in large bowl. Place in slow cooker.
- For the Cobbler Topping, mix all ingredients, except butter, in medium bowl. Cut in butter with fork until crumbly. Sprinkle over Apple Filling. Cover.
- Cook 3 hours on high.
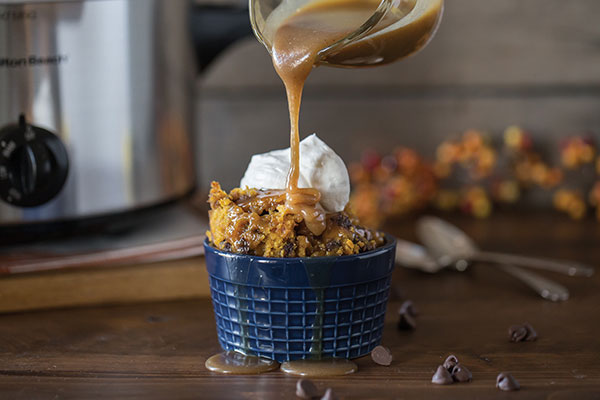
Slow Cooker Pumpkin Cake with Caramel Sauce
Prep time: 10 minutes
Cook time: 3 hours, 35 minutes
Servings: 16
Pumpkin Cake:
- 1 package (2-layer size) yellow cake mix
- 1 can (15 ounces) pumpkin
- 1/4 cup (1/2 stick) butter, melted
- 1/4 cup milk
- 2 eggs
- 2 teaspoons McCormick Pumpkin Pie Spice
- 1 cup chocolate chips
Caramel Sauce:
- 1 cup firmly packed brown sugar
- 1/2 cup heavy cream
- 1/4 cup (1/2 stick) butter
- 1 teaspoon McCormick Pure Vanilla Extract
- 1/2 teaspoon McCormick Pumpkin Pie Spice
- Spray inside of 6-quart slow cooker with no stick cooking spray. For the Cake, mix all ingredients in large bowl. Pour into greased slow cooker. Place towel over slow cooker and cover with lid.
- Cook 3 1/2 hours on low or until cake is almost set.
- Meanwhile, for the Caramel Sauce, cook and stir all ingredients in small saucepan on medium-high heat 5 minutes or until sauce is smooth.
- Carefully remove slow cooker insert and place on wire rack. Pour 1/2 of the Caramel Sauce over the cake. Let stand 10 to 15 minutes to cool slightly. Serve cake with remaining sauce and ice cream or whipped cream, if desired.
- Substitution: Use 1 cup chopped candy bars in place of the chocolate chips.
Source: McCormick

Warm Up This Winter with Easy Mug Desserts
(Family Features) Need a little warming up after a day out in the cold and snow? The McCormick Kitchens are sharing “hug in a mug”-themed desserts perfect for coming together after a day outside in a winter wonderland. Completely customizable, these treats are a delicious way for the whole family to stay warm this winter.
This Fudgy Raspberry Mug Brownie for two is made in the microwave in less than 10 minutes and topped with whipped cream and raspberries. To enjoy cool mint flavor instead, use peppermint and vanilla extracts in place of raspberry.
For more mug dessert recipes – from candy bar blondies to hot chocolate – visit www.McCormick.com and check out McCormick Spice on Facebook and Pinterest.
Fudgy Raspberry Mug Brownie
Servings: 2
- 3 tablespoons miniature chocolate chips
- 1 tablespoon butter
- 2 tablespoons packed brown sugar
- 2 tablespoons flour
- 1 egg yolk
- 1 teaspoon milk
- 3/4 teaspoon McCormick Raspberry Extract
- Microwave chocolate chips and butter in microwavable coffee mug on high 30 seconds or until melted. Stir. Add remaining ingredients; mix well.
- Microwave on high 45 seconds to 1 minute or until center looks almost set. Let stand 5 minutes before serving.
Note: For a Fudgy Peppermint Mug Brownie, replace Raspberry Extract with 1 teaspoon McCormick Pure Vanilla Extract and 1/4 teaspoon McCormick Pure Peppermint Extract.
Caution: Mug may be hot. Use pot holders when removing from microwave.

Decadent Treat-Filled Desserts

(Family Features) Creating one-of-a-kind desserts doesn’t have to take hours in the kitchen or even exceptional baking skills. With a little imagination and the right tools, you can whip up surprisingly delicious sweets that will surprise and delight your friends and family.
Focus on flavor
If your baking repertoire typically consists of white cake and chocolate frosting, spice things up a bit by experimenting with new fillings and flavor combinations. Opt for complementary or contrasting tastes for a truly delectable dessert. For example, pair fudgy chocolate cake with tangy berries, or see how a bold flavor like lemon adds a new dimension to a mild vanilla.
Add a special touch
Infusing new flavors into your favorite cake or brownie recipe is surprisingly easy when you use bakeware made for the purpose. Baker’s Advantage Fillables Bakeware helps home bakers easily create “treat-filled” desserts. Each bakeware set comes with two pans: One pan creates the bottom half of the cake and forms indentations in the cake you can fill with fruit, puddings, candy and more, while the second pan creates the top half of the cake, which hides the surprise fillings.
Shape it up
Artfully applied frosting and other decorations can instantly dress up a basic cake, but another option is upgrading the shape of the cake itself. In addition to traditional square, round and sheet cake pans, the Baker’s Advantage Fillables Bakeware collection includes mini heart cakes, fluted cakes, mini loaf cakes and a cake cones pan. These special shapes make it easy to create enviable desserts out of classic recipes.
Bake In the Fun
Making a cake with a treat hidden inside is as easy as 1-2-3 with Fillables Bakeware from Baker’s Advantage. Because the bakeware does all of the work for you, there are no special baking skills required; just pour in the batter and bake. Then, fill the pockets in the cake with any treat you like and spread icing to cover the surprise. Next, add the top cake layer, ice the whole cake, slice and serve.
Find more surprisingly easy dessert ideas at FillablesbyBakersAdvantage.com.

Brownie Cake Cones
Recipe courtesy of Baker’s Advantage/Alissa Wallers
- 3 ounces unsweetened chocolate
- 2 sticks butter
- 1/2 cup cocoa powder
- 2 1/2 cups sugar
- 3 eggs
- 1 tablespoon vanilla extract
- 1 1/2 cups flour
- 1/2 teaspoon salt
- 2 teaspoons baking powder
- nonstick cooking spray
- Vanilla Frosting (recipe below) or ice cream
- Heat oven to 350° F.
- In double boiler, melt chocolate and butter.
When melted, place in large bowl and whisk in cocoa powder until smooth. Add sugar and mix. - Combine eggs and vanilla; gently mix with fork or whisk to break up eggs. Add eggs and vanilla to batter.
- Sift together flour, salt and baking powder. Fold in flour until just combined.
- Spray Fillables 8 Cup Cake Cone Pan with nonstick cooking spray. Fill bottom pan with batter to line in middle of pan then place insert on top and snap together.
- Place on middle of rack in oven and bake 15-18 minutes. Allow to cool before removing from pan.
Filling suggestions:
• Graham crackers, chocolate chips and marshmallows
• Whipped cream and berries
• Ice cream or pudding
- Add fillings inside cone, top with Vanilla Frosting or ice cream, and serve.
Vanilla Frosting
Recipe courtesy of Baker’s Advantage/Alissa Wallers
- 3 sticks butter, unsalted and at room temperature
- 6 cups powdered sugar
- 2 teaspoons vanilla extract
- 1/2 teaspoon salt
- 1/4 cup heavy cream
- Using handheld or stand mixer, cream butter on high, about 3 minutes.
- Add powdered sugar 1/2 cup at a time, mixing on medium between each addition.
- Scrape bowl well. Add remaining ingredients; mix on low until incorporated.
- Turn mixer to high and beat frosting until light and fluffy, about 5 minutes.
- Use immediately or store in airtight container in refrigerator.
Note: Frosting must be at room temperature prior to using.

Berries and Cream Fluted Pound Cake
Recipe courtesy of Baker’s Advantage/Alissa Wallers
- 4 sticks butter, room temperature
- 3 cups sugar
- 6 eggs
- 4 teaspoons vanilla extract
- 3 1/2 cups flour
- 2 teaspoons baking powder
- 1 teaspoon salt
- 1/2 cup milk, at room temperature
- nonstick cooking spray
- Heat oven to 350° F.
- With stand or handheld mixer, cream butter and sugar until light and fluffy. Add eggs one at a time, scraping between each egg. Add vanilla extract.
- Sift flour, baking powder and salt together. Add flour mixture to mixing bowl and slowly add milk while mixing. Mix until just combined.
- Spray Fillables Fluted Cake Pan with nonstick cooking spray. Fill bottom of both pans with batter to three-quarters full.
- Bake on middle rack in oven 20-25 minutes. Allow to cool before removing from pan.
Filling suggestions:
• Blueberries, plus additional for topping
• Raspberries, plus additional for topping
• Strawberries, stem removed and cut into small pieces, plus additional for topping
• Vanilla Frosting (recipe below)
- Fill pockets in bottom layer of pound cake with different berries.
- Carefully spread Vanilla Frosting over top of berries and cake.
- Place top layer of cake on top of frosting.
- Drizzle warmed up Vanilla Frosting over top of cake.
- Decorate top with berries.
Vanilla Frosting
Recipe courtesy of Baker’s Advantage/Alissa Wallers
- 3 sticks butter, unsalted and at room temperature
- 6 cups powdered sugar
- 2 teaspoons vanilla extract
- 1/2 teaspoon salt
- 1/4 cup heavy cream
- Using handheld or stand mixer, cream butter on high, about 3 minutes.
- Add powdered sugar 1/2 cup at a time, mixing on medium between each addition.
- Scrape bowl well. Add remaining ingredients; mix on low until incorporated.
- Turn mixer to high and beat frosting until light and fluffy, about 5 minutes.
- Use immediately or store in airtight container in refrigerator.
Note: Frosting must be at room temperature prior to using.
Source: Lifetime Brands